Navigate to the User Panel > Fax tab or click the blue Fax icon from the User Panel to navigate to the Fax tab.
The Fax dashboard provides fax capabilities within the User Panel. Faxes can be sent to/from users from their email address or DID (Direct Inward Dial) number, when assigned.
Send a fax from the main menu or navigate to additional tabs to view Received Faxes, Sent Faxes, Stored Files, or manage Fax Settings.
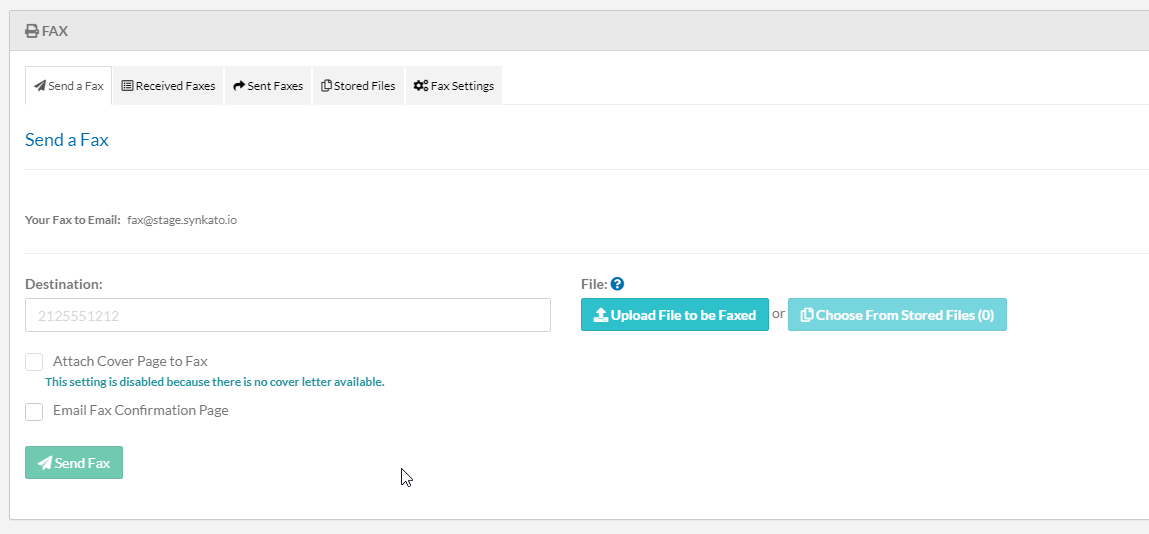
Send a Fax Tab
To send a fax, enter a 10-digit fax number and click Upload File to select a file to fax. Acceptable file formats include: .pdf, .doc, .docx, .xls, .xlsx and .csv.
Choose from Stored Files can also be used when common files are uploaded from the Stored Files Tab, such as a cover sheet or other commonly sent files.
Click the Attach Cover Page to Fax? checkbox to prepend the fax with a cover sheet. Click Send Fax when finished. A status bar displays on this screen and updates after completion.
Click the Email Fax Confirmation Page to receive a confirmation page sent to your email when a fax is successfully sent.
A full detail of a sent fax is available on the Sent Faxes tab.
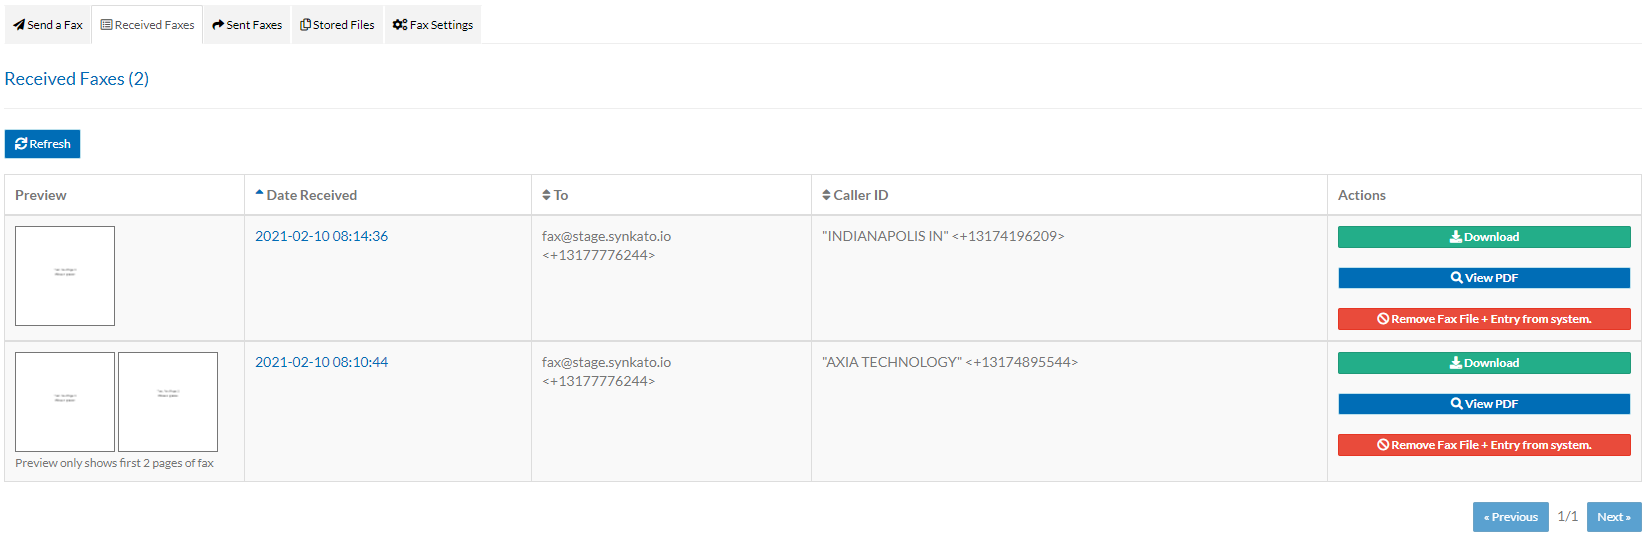
Received Faxes Tab
The Received Faxes tab displays faxes received to the user's direct inward dial (DID) number. Inbound faxes are also sent to the user's email address as a PDF file.
Each fax includes a content preview, received date, and to/from Caller IDs. Received faxes can be downloaded, viewed (Browser Only) or removed from the system; ideal for confidential material.
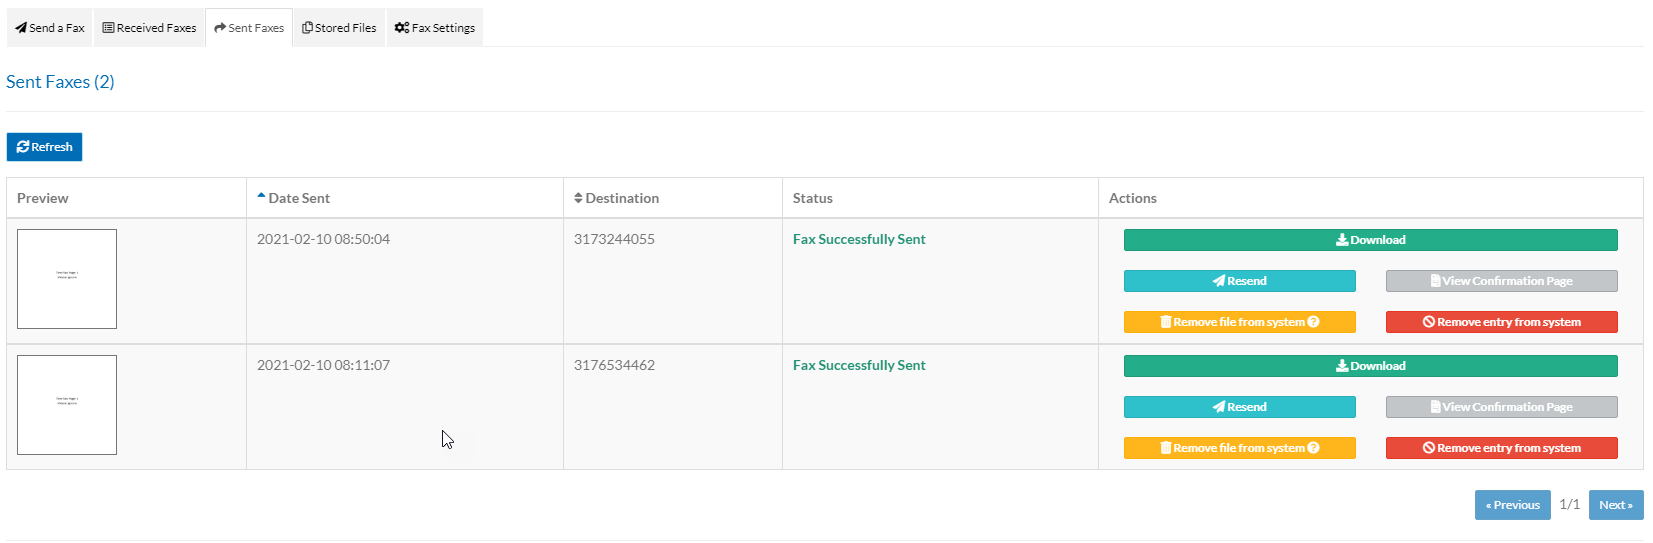
Sent Faxes Tab
The Sent Faxes tab displays any faxes that the user has sent through the Fax panel. Sent faxes can be downloaded, viewed (Browser Only) or resent. You also have the ability of viewing the confirmation page if one was selected to be sent. You also have the ability to remove the file from displaying in the UI or to completely remove the file.
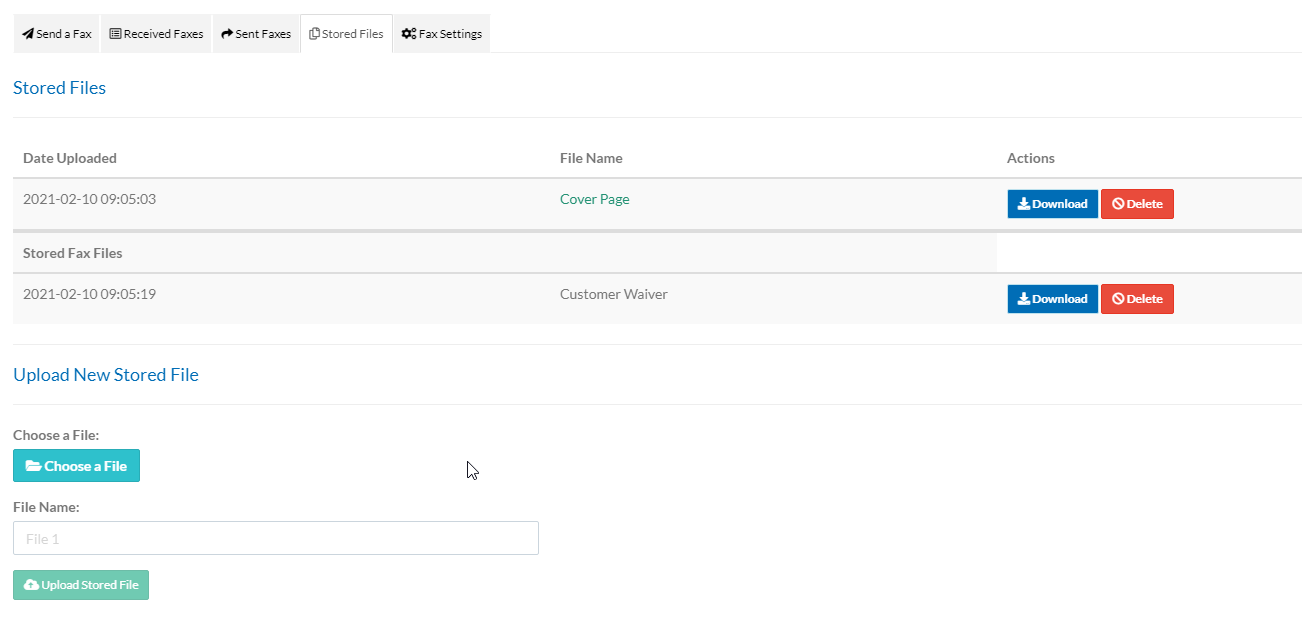
Stored Files Tab
The Stored Files tab houses commonly sent files for future use. This feature eliminates the need to upload a new PDF file each time an outbound fax is sent.
The Cover Page file appears at the top of the Stored Files tab. This static cover page can be prepended to an outbound fax by clicking the Attach Cover Page to Fax? checkbox on the Send a Fax tab.
Edit the stored cover page file by deleting the file and uploading a new cover page as explained below.
Add Stored File
To add a new stored file, such as a customer release or legal form, click Choose a File. Browse to and select the file, enter a name for the file and click Upload Stored File.
Note: File format must be PDF.
Stored Files can be downloaded or deleted as needed.
Fax Settings Tab
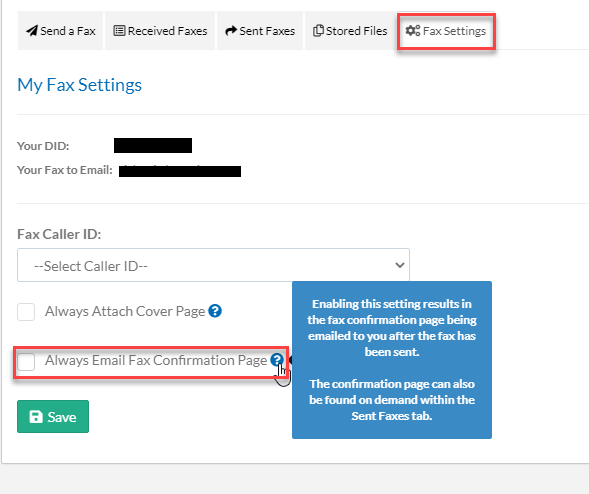
The Fax Settings tab allows the user to determine which Fax Caller ID to include on outbound faxes. A user can also select a group fax, when assigned. Select the Fax Caller ID from the available drop-down menu and click Save when finished.
You also have the options to check Always Attach Cover Page and Always Email Fax Confirmation Page.

Email to Fax
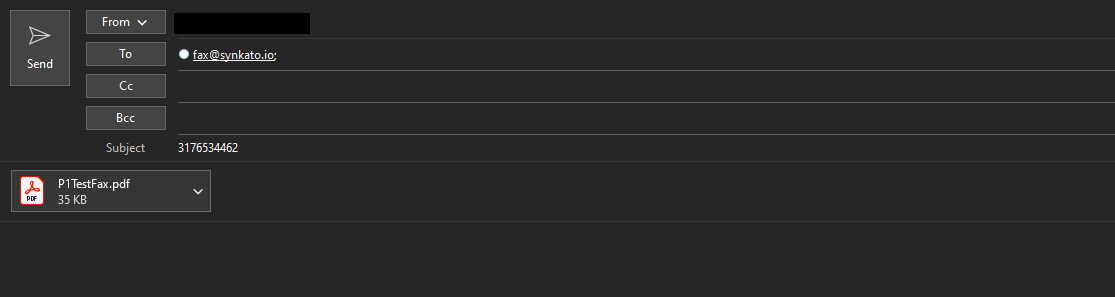
As of the 2021.02.1 version of Synkato, you now have the ability to send a fax from your personal email (Sender's email must match your username on the system you wish to send the fax from). To initiate a fax, send your file to fax@synkato.io. The subject will be the destination fax number. You can then attach your file that you would like to send. Acceptable file formats include: .pdf, .doc, .docx, .xls, .xlsx and .csv
Only one file will be faxed per email. If you have multiple files to fax, each file will need to be sent in its own email.
After sending the fax you will be able to log into the Synkato faxing dashboard and see the fax within the Sent Faxes tab in the User Panel > Fax module.
NOTE: Please remove any other attachments or email signatures from this email. This may cause the fax to not be delivered properly if there are any images in the signature.
Fax Confirmation Page
As of the 2021.02.1 version of Synkato, you now have the ability to send Fax Confirmation Pages via email after sending an email. You have the option to receive a confirmation page on each sent fax. To do then, select the Email Fax Confirmation Page checkbox on the Send A Fax tab.

You also have the ability to always recieve Fax confirmation pages when sending faxes. To enable this, go to the Fax Settings tab and enable Always Email Fax Confirmation Page.
Once a fax has been sent you can now go to the Sent Faxes tab and click the View Confirmation Page to open the PDF. The confirmation page will show the time and date that the fax was sent, the from and destination, the number of pages that were sent, and how long it took to send the fax. It will also display a thumbnail of the first page of the sent fax.
Below is an example of what the Fax Confirmation Page looks like when opened.

