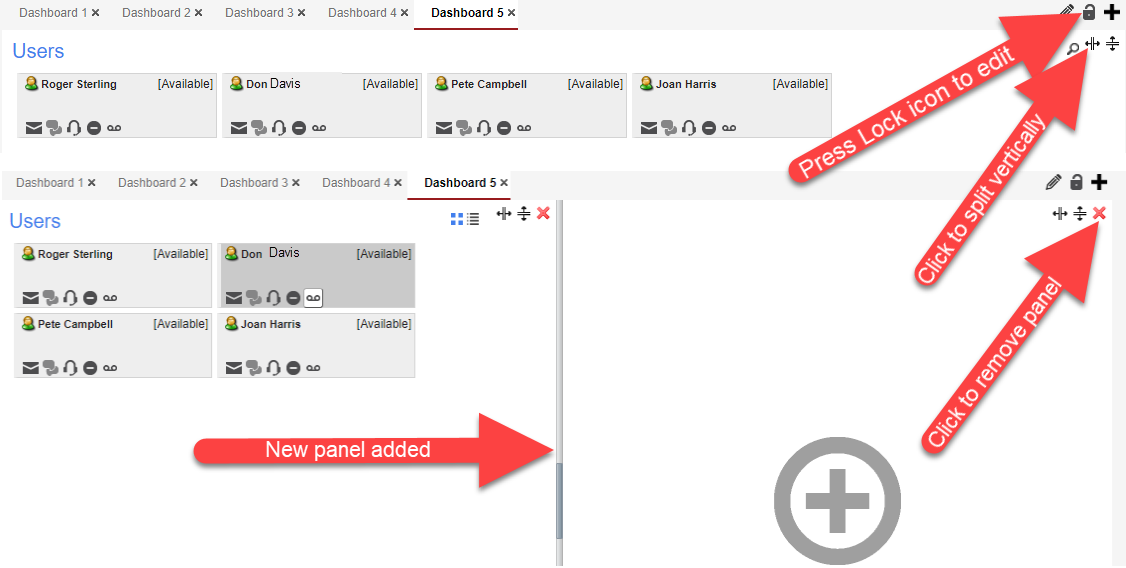
You can modify the layout of a dashboard to better fit your needs by horizontally and/or vertically splitting existing panels in the layout or removing panels completely from the layout. To modify a dashboard layout, select the dashboard you want to edit then press the lock icon (![]() ) to lock/unlock the dashboard.
) to lock/unlock the dashboard.
Panel Management
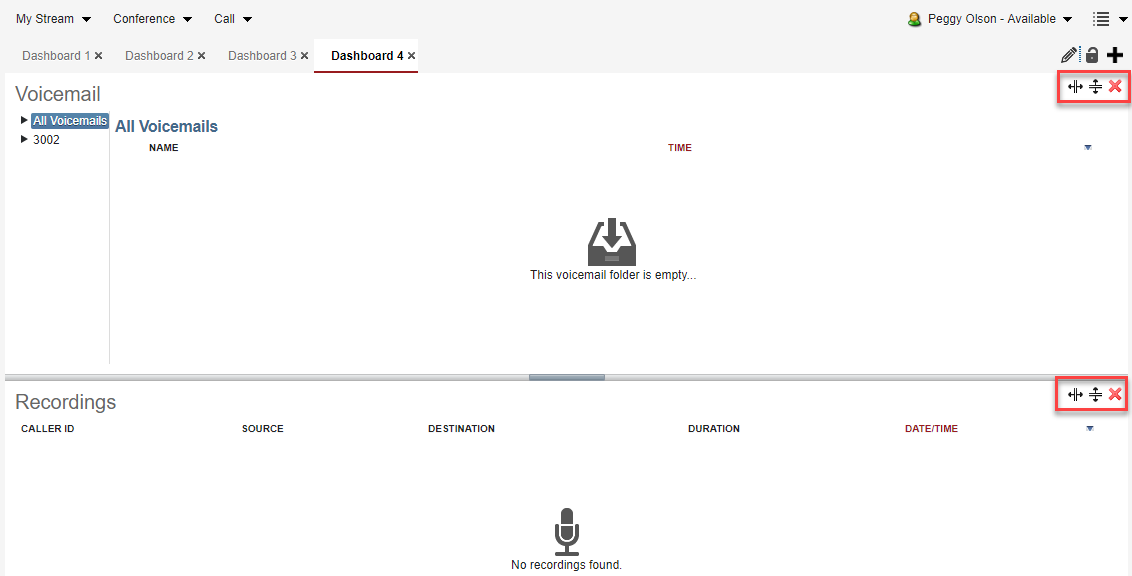
Panels in the layout provide a place to insert Widgets. Each panel in the layout can hold one Widget. If the layout is unlocked or there is a panel that does not currently contain a Widget, you will have to access the panel actions via the three buttons that appear on the top-right corner of the panel.
 Figure 01: Panel Management Icons
These actions allow you to create new panels by splitting existing ones or removing panels all together.
Splitting or Removing Panels
| NOTE: | Before splitting or removing panels, click the Lock icon ( |
To split a panel into two separate sections along the vertical axis of the existing panel click the Vertical Split icon:![]() . This creates a second panel directly next to the existing one.
. This creates a second panel directly next to the existing one.
To split the panel into two panels along the horizontal axis of the existing panel click the Horizontal Split icon:![]() . This creates a second panel directly below the existing one.
. This creates a second panel directly below the existing one.
 Figure 02: Vertical Split Example
To remove a panel press the delete icon:![]() . The panel, including all Widgets in the panel, will be removed from the layout.
. The panel, including all Widgets in the panel, will be removed from the layout.
