From the main menu, navigate to System Settings > Network & Firewall.
An installer can view and manage Network Settings, Firewall, Time Settings, Interface Routing, and HTTPS. General users can view and manage Firewall Rules and Time Settings.
Main Menu

Network Settings
Note: Hosted systems should reach out to support instead of altering content.
Configure the network, DNS, and Interface settings of the Kerauno server on the Network Settings tab. Common edits include System Name and changes to reflect network changes.
Populate the fields:
- System Name: Name of the system; referenced in alerting and reporting emails.
- HostName: Name assigned to this Kerauno instance (e.g., servername.kerauno.io).
- Default Gateway: IP address of the default gateway on the network.
- DNS 1: IP address of the primary DNS server.
- DNS 2: IP address of a secondary DNS server.
- Primary Interface Settings
- IP Address: Public IP address of the Kerauno server.
- Subnet Mask: Subnet mask of the network the Kerauno server is connecting to (will be provided).
- Secondary Interface Settings
- IP Address: Public IP address of the Kerauno server (prepopulated).
- Subnet Mask: Subnet mask of the network the Kerauno server is connecting to (will be provided).
- When finished modifying settings, click Update Network Settings to save changes.

Firewall
Communication traffic to Kerauno is blocked by default, with the exception of the Kerauno Management network and any trunks established from System Admin > Trunks menu. Click the Firewall tab to establish rules to whitelist specific IP addresses to pass through Kerauno unobstructed. This tool is particularly useful when setting up phones for remote users who are utilizing their own home internet connections.
When accessing Kerauno via the web GUI, an installer must whitelist the public IP address of the network or PC in order to gain access to the Kerauno Presence module. Also, devices cannot properly register to Kerauno until the IP address is whitelisted.
To find your public IP address, go to https://www.google.com/#q=my+ip+address.
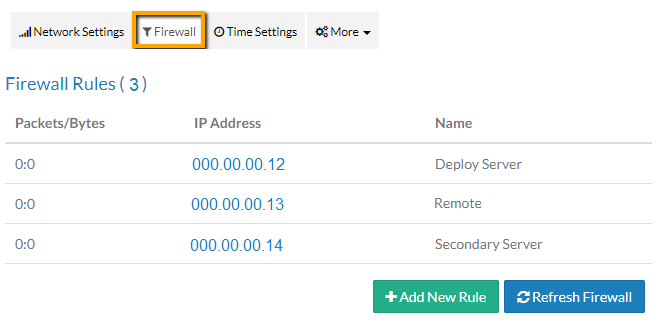
Active Firewall Rules appear on the main screen. Only IP addresses saved here are able to send traffic to and from Kerauno. The Packets/Bytes column represents the number of incoming packets from each IP address, as well as how many total bytes of data were transferred through those packets.
Main Menu
Add Firewall Rule
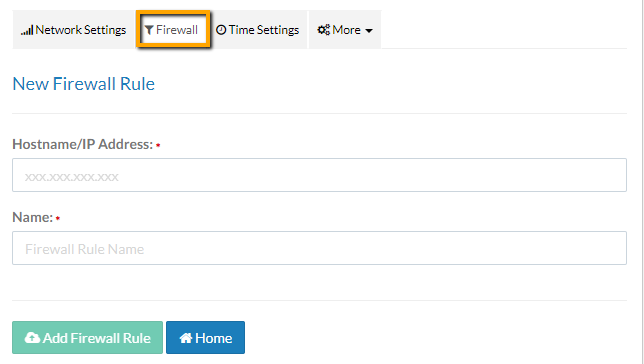
To add a new firewall rule, click + Add New Rule. Populate the IP Address or Hostname the traffic originates from. Ensure all phone system users are configured with a static public IP address. When configured with a dynamic IP address, the firewall must be modified each time the dynamic IP address changes. When a static IP is not an option, enter a DNS hostname when creating a rule.
Provide a recognizable name for the firewall rule. Then click Add Firewall Rule when finished.
Delete Firewall Rule
Delete a Firewall Rule to revoke access to send and receive data from Kerauno. Click the corresponding rule on the main menu. Then click Delete Firewall Rule on the resulting screen.
Time Settings
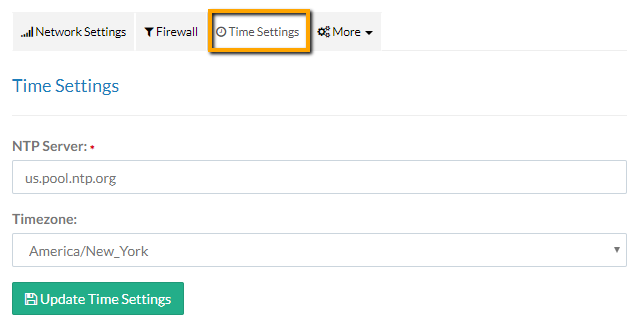
The NTP Server name and Timezone can be edited from the Time Settings tab.
NTP Server: The NTP server regulates the internal time clock in Kerauno. The default NTP server is us.pool.ntp.org—a public NTP service.
Timezone: Timezone for the internal time of Kerauno. Note that individual timezones can be set for each extension under Users & Devices when employees are dispersed geographically across various time zones.
Interface Routing
Note: Premise instances only.
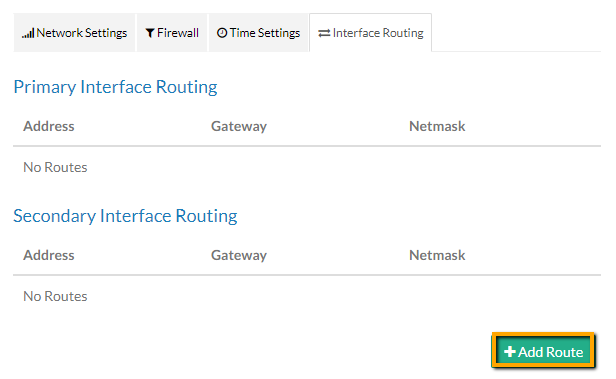
The Interface Routing tab from the More drop-down menu allows installers to route traffic for a particular destination (IP address) that is not serviced by the default gateway (e.g., separate VLAN internally). An Interface Route is helpful when there are multiple network interfaces on a Premise deployment.
Work with your network provider and IT team to determine if an Interface Route is required.
Add Interface Route
To add a new interface route, click + Add Route.
Populate the fields:
- Interface: Select either Primary or Secondary from the drop-down menu.
- IP Address: Public IP address of the Kerauno server.
- Gateway: Gateway IP address.
- Netmask
- Click Add Route when finished.
Edit Route
Click the corresponding Route on the main menu. Edit as needed and click Update Route on the resulting screen.
Delete Route
Click the corresponding Route on the main menu. Then click Delete Route on the resulting screen.
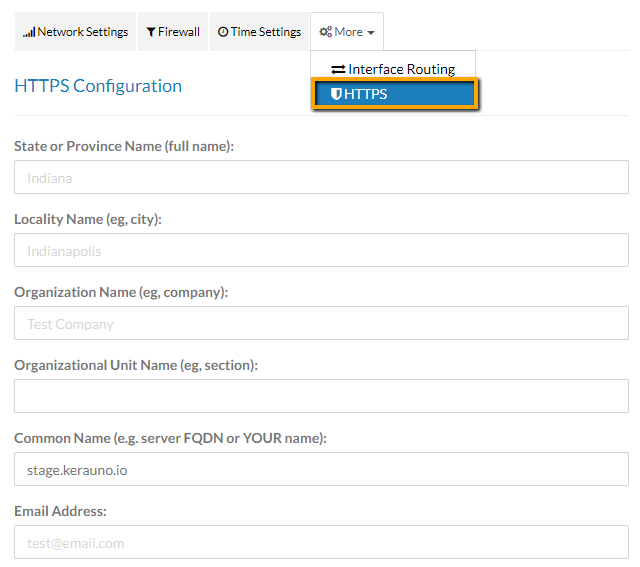
HTTPS
Click the HTTPS tab from the More drop-down menu to manage SSL Certificates.
Note: Reserved for Premise users only maintaining their own SSL certs. Example SSL providers include GoDaddy, VeriSign, and LetsEncrypt.
Populate the fields:
- State or Province Name (full name)
- Locality Name (e.g., city)
- Organization name (e.g., company)
- Organizational Unit Name (e.g., section)
- Common Name (e.g., server FQDN or YOUR name)
- Email Address
- Generate CSR: Click Generate CSR once all information is recorded above.
- Generated CSR: Send the data in the Generated CSR field to your SSL provider.
- Generated Key
- SSL Certificate: Paste the SSL Certificate data received from your SSL provider in the SSL Certificate field.
- Click Save Settings & Enable HTTPS when finished.

