The Action Bar is shown at the top of the screen and allows you to quickly initiate calls, transfer calls, place calls on hold or even create impromptu conference bridges. The buttons on the Action Bar display throughout Synkato Presence and are present on every dashboard.
 Figure 01: Action Bar
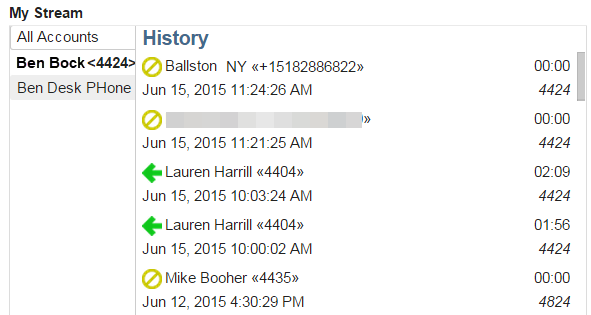
My StreamShortcut: "M" KeyThe My Stream button opens the My Stream window that displays all active calls, chat sessions and call history. This button is useful when switching between multiple dashboards, as active calls are always visible from this menu. |
|
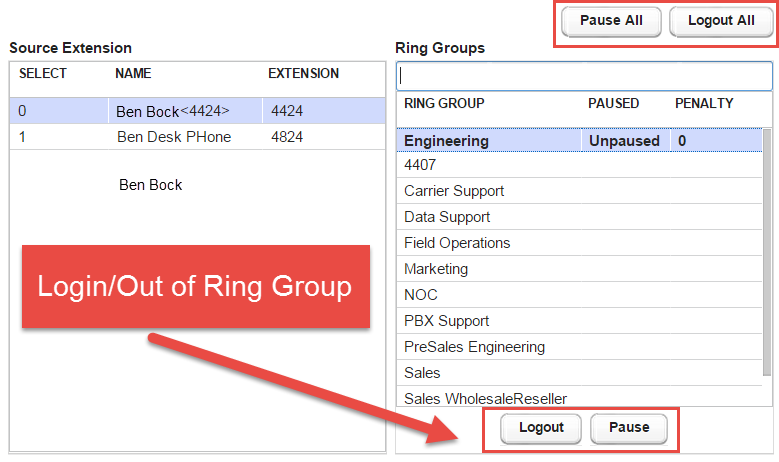
Ring GroupShortcut: "Q" KeyThe Ring Group button displays a list of all Ring Groups currently configured in the Synkato phone system. Clicking on a ring group on the right side of the panel allows you to login or logout of a specific group. The Logout All button at the top-right of this menu allows a user to logout of all ring groups that they may be a part of. |
|
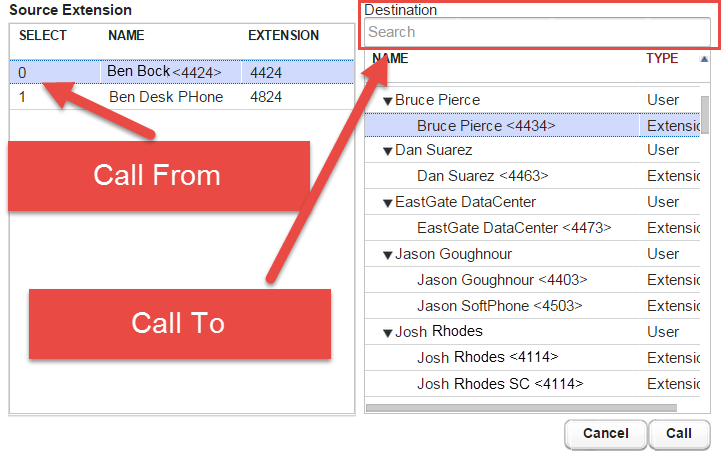
Call ButtonShortcut: "C" KeyThe Call button allows users to originate calls to specific extensions or external numbers. The panel on the left allows the user to choose which of their extensions to dial from; the panel on the right allows the user to determine which extension or external number to call. The Destination bar can be used to search by extension and name, but can also be used to dial any other telephone number. |
|
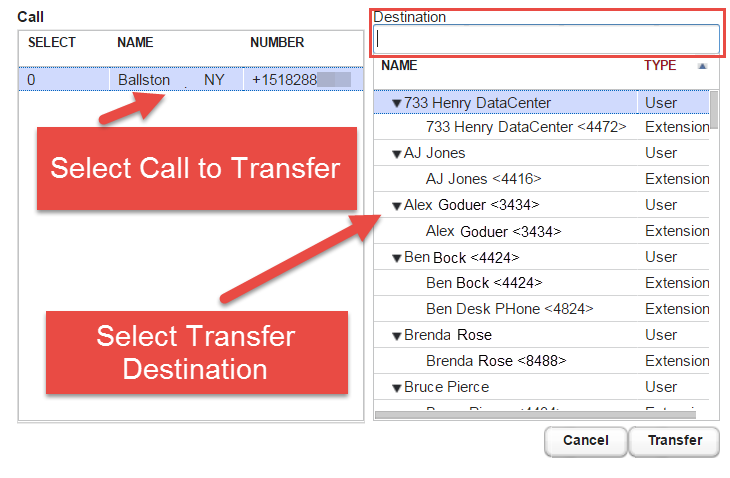
Transfer ButtonShortcut: "T" KeyThe Transfer button allows a user to easily transfer calls to any other extension within the Synkato phone system. On the left panel, a list of active calls is displayed; on the right panel, all extensions built in the phone system are listed. To transfer a call, select the desired transfer destination from the panel on the right and click Transfer. The Destination bar can be used to search by extension and name. You may also transfer to any telephone number by typing it in this bar. |
|
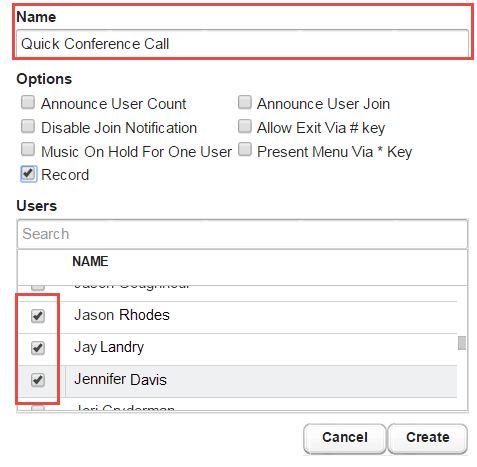
Conference ButtonShortcut: "R" KeyThe Conference button allows you to create ad-hoc conference rooms on the fly. To do this, click the Conference button from the action bar. In the first box on the menu that follows, give the temporary conference room a name (e.g., Temp Conference, Quick Call, etc.). Under the Users menu, check the boxes next to any user that you would like to join the conference. When you have checked all the users that you would like to include, click the Create button. All selected users will be dialed simultaneously into the conference. |
|
| NOTE: | If you would like to be included, make sure to check your own name as well. |
Hold Button
Shortcut: "X" Key
Use the Hold button to toggle calls between active/held states. To do this, simply select the Hold action button, click the active call, and select Hold.
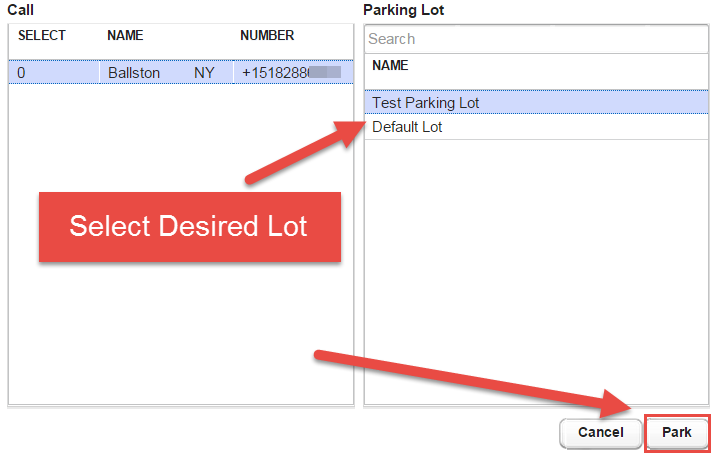
Park ButtonShortcut: "P" KeyThe Park button allows you to quickly place a call into a parking lot. To place a call on park, select the desired call on the panel to the left then select the desired parking lot in the panel on the right. Press the Park button to place the call into the selected parking lot. |
|
