This article contains steps for installing the Salesforce for Synkato Managed Package outside of the Salesforce AppExchange for both Lightning and Classic.
Required Components
- Managed Package (link provided by Synkato)
- One of the following force.com experiences:
- Lightning
- Classic
- One of the following communication methods:
- Softphone
- Bolt Softphone version 5.5.3 or higher
- Presence
- Physical handset
- Physical devices supported by Synkato
- Softphone
- Synkato (version 3.1 or higher) configured for Salesforce.
Lightning Experience
Installing the Managed Package
The Managed Package provides the integration means from Synkato to Salesforce.
Note: Salesforce supports Chrome, Firefox, Apple Safari and IE 11+ for installing the Managed Package.
The Managed Package provides the following interactions:
- Inbound Screen Pop
- Outbound Click-to-Call
- Record Association
- Auto Task Provisioning
- Call Statistics
The link to install the Managed Package will be provided to you by Synkato.
Complete the following steps to install the Managed Package:
Log in with the Salesforce System Administration Account.
At the following screen, click the radio button for Do not install for the existing component naming conflict question:

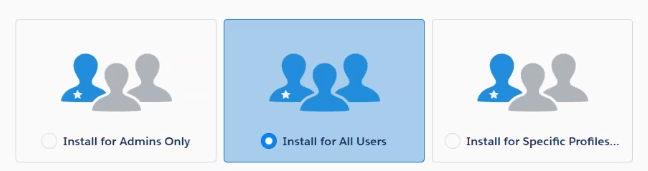
Select Install for All Users from the 3 install options:
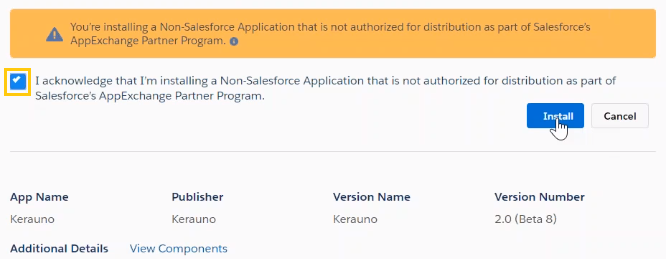
Read and check the acknowledgement message (if displayed), and click Install:
Result: A progress window displays during the installation: 
Note: This could take up to a few minutes to complete. A message may display indicating the install is taking too long; an email will be sent when the install is complete.
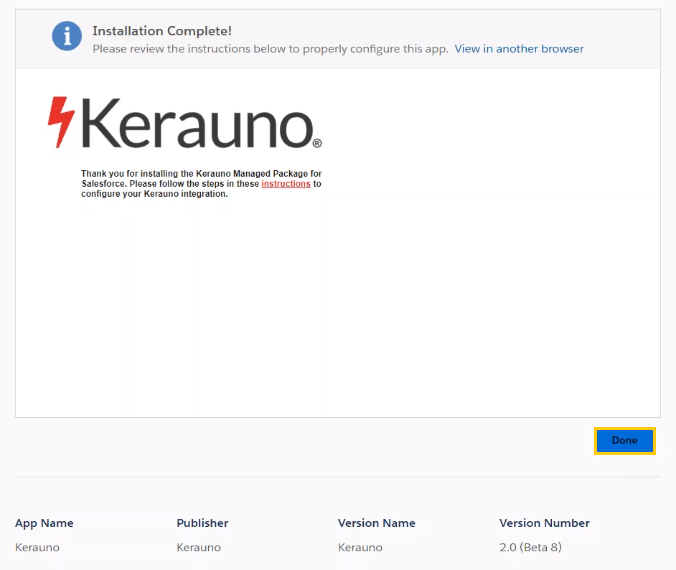
When the install finishes quickly, the following is displayed. Click Done:
Determining Salesforce & Synkato Instances
Configuring the Server and Instances attributes outlined below is necessary for Salesforce to understand which Synkato instance you are associated with and for Synkato to understand which Salesforce instance you are accessing the integration from.
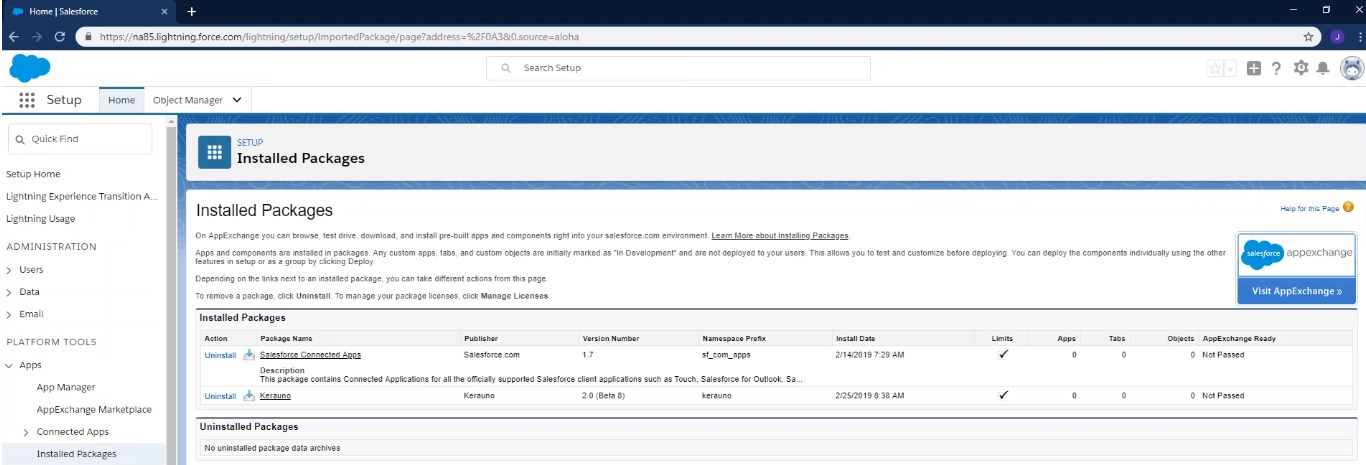
If not automatically directed here once the installation is complete, navigate to Setup > Home > PLATFORM TOOLS > Apps > Installed Packages.
The Installed Packages screen displays:
Copy and paste the following text into Notepad or similar editing tool.
Note: Domain names may vary depending on your system:
Synkato Server: {server}.synkato.io
Lightning Domain: {Lightning Domain instance}.lightning.force.com
Visualforce Domain: synkato.{Visualforce Domain instance}.visual.force.com
AdapterPage URL: (Collected later in installation steps)
To identify the Synkato instance, access the Synkato web app. Locate the Synkato Server name in the browser URL.
In this example, the server name is your-instance.
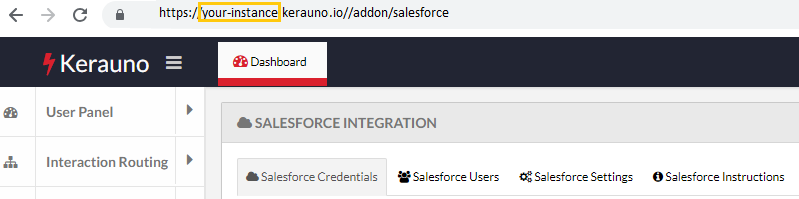
Copy and paste the Synkato Server name in the {server} placeholder in the text editor.
Example:
Synkato Server: your-instance.synkato.io
In Salesforce, locate the Salesforce Server Instance in the browser URL:

In this example, the Server Instance is na85. Copy and paste the Server Instance name in the {Instance} placeholders.
Example:
Lightning Domain: na85.lightning.force.com
Visualforce Domain: synkato.na85.visual.force.com
Custom Metadata Setting
Metadata settings are required to facilitate communication for the Synkato Salesforce integration.
Navigate to Setup > Home > PLATFORM TOOLS > Custom Code > Custom Metadata Types. Click Manage Records next to Synkato Setting:

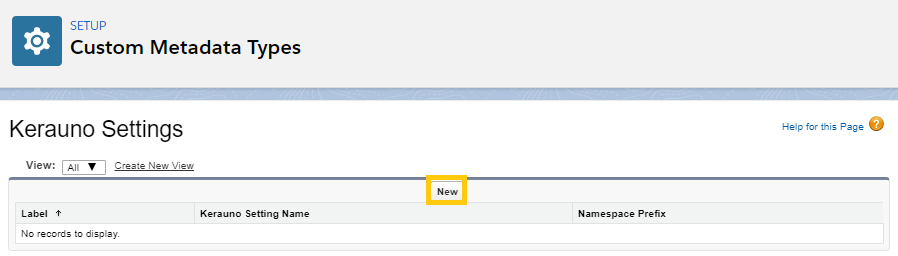
Click New on the resulting Synkato Settings screen:
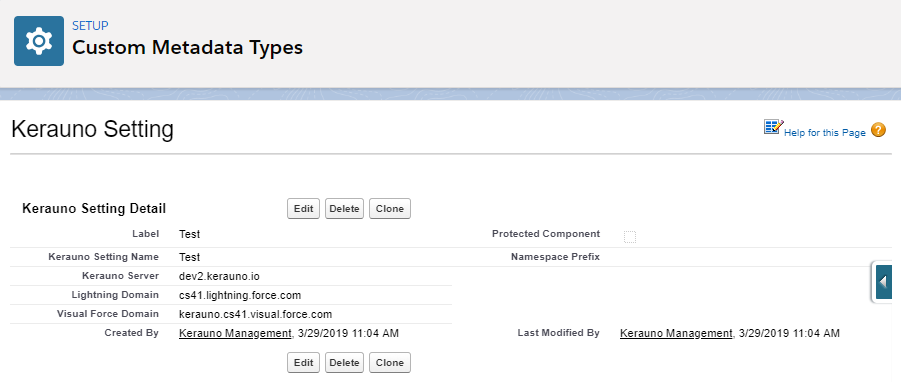
Populate the New Synkato Settings screen and click Save:
| Field | Input Description |
| Label | Enter a Synkato Setting Name to be used when it loses focus. |
| Synkato Setting Name | Auto populates once a Label name is provided. |
| Synkato Server | Copy and paste these from the Determining Salesforce and Synkato Instances section. Note: These Domain names may vary depending on your system. |
| Lightning Domain | |
| Visual Force Domain | |
| Screen Pop Inbound | Leave these blank unless instructed otherwise. |
| Screen Pop Outbound | |
| Custom Object 1 | |
| Custom Object 1 Number Field | |
| Customer Object 1 Phone Field |
The saved setting details display once saved:
Set up Call Center(s)
The Managed Package includes a Computer-Telephony Integration (CTI) to Salesforce Call Centers. The integration facilitates inbound and outbound calls; while capturing call details and notes.
Navigate to Setup > Home > PLATFORM TOOLS > Custom Code > Visualforce Pages.
To identify the URL for the AdapterPage, click the preview icon next to Security for the AdapterPage Label:

Copy the URL that displays for the AdapterPage in a new browser window and paste it into Notepad or a similar editing tool:

Example:
AdapterPage URL: https//synkato.na85.visual.force.com/apex/AdapterPage
Note: The AdapterPage may not load until everything is fully configured.
Navigate to Setup > Home > Feature Settings > Service > Call Center > Call Centers.
Click the Synkato Integration Lightning hyperlink:

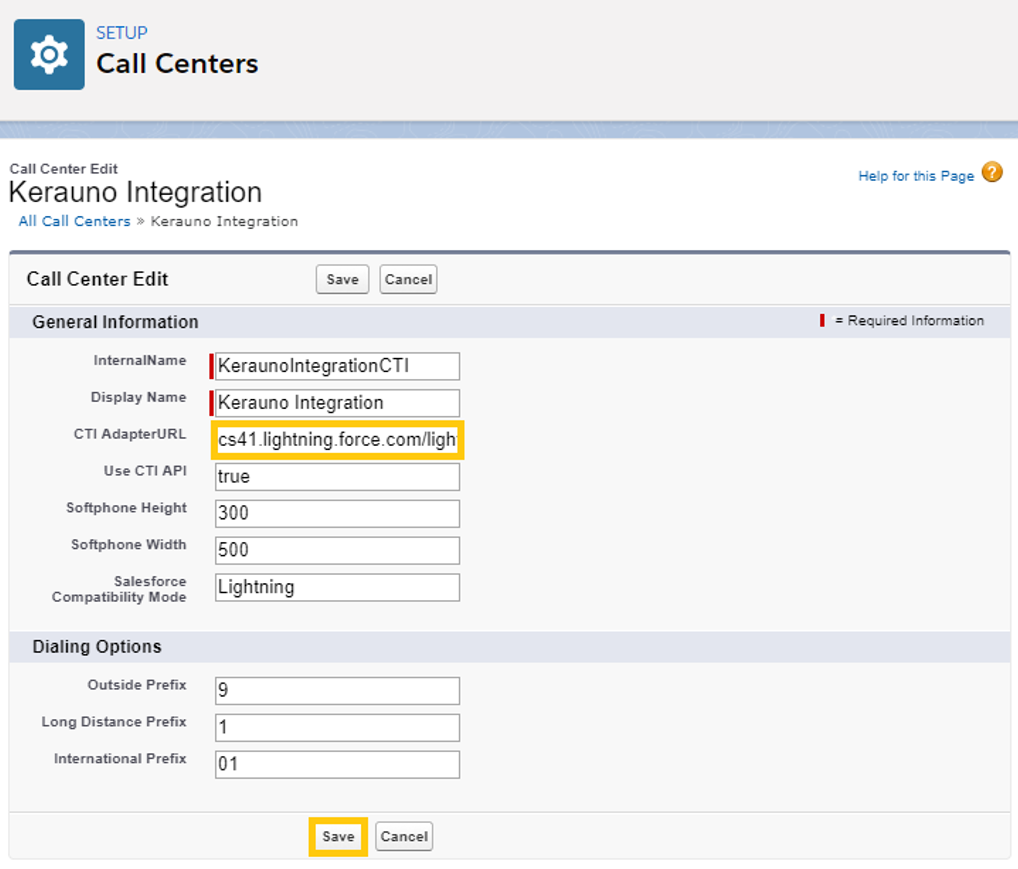
The Call Center Detail screen displays. Click Edit:
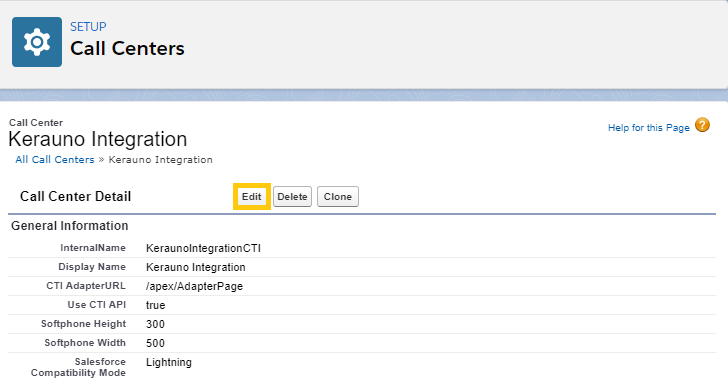
Remove the current content in the CTI AdapterURL field and paste the content with the AdapterPage URL that was copied in the Set up Call Center(s) section. Then click Save:
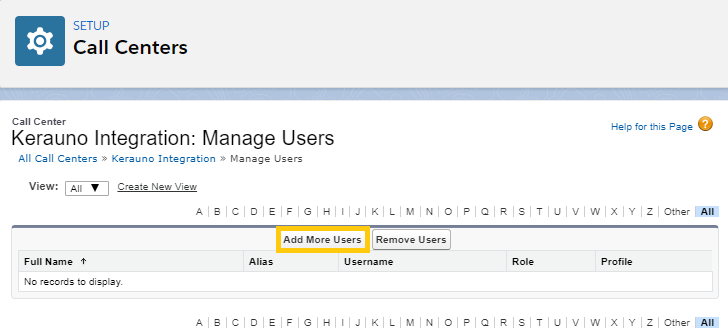
Click Manage Call Center Users to add users to the Call Center:

Click Add More Users:
Note: A user can only be in one Salesforce Call Center at a time (not Lightning and Classic concurrently).
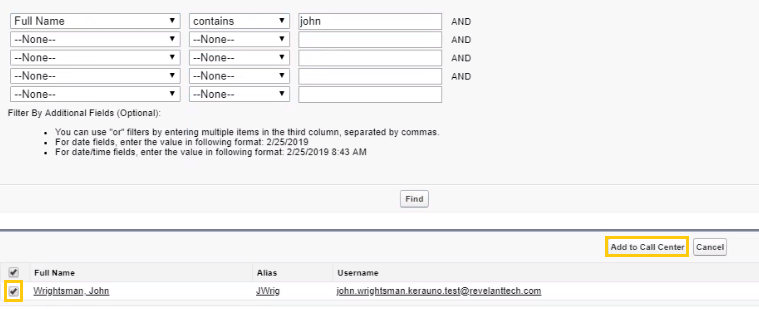
Use the search filters to identify additional users to add. Popular filters include Full, First, Last, and Username as shown below: 
Click the checkbox for the appropriate user on the search results screen and click Add to Call Center:
App Setting & Utility Enablement
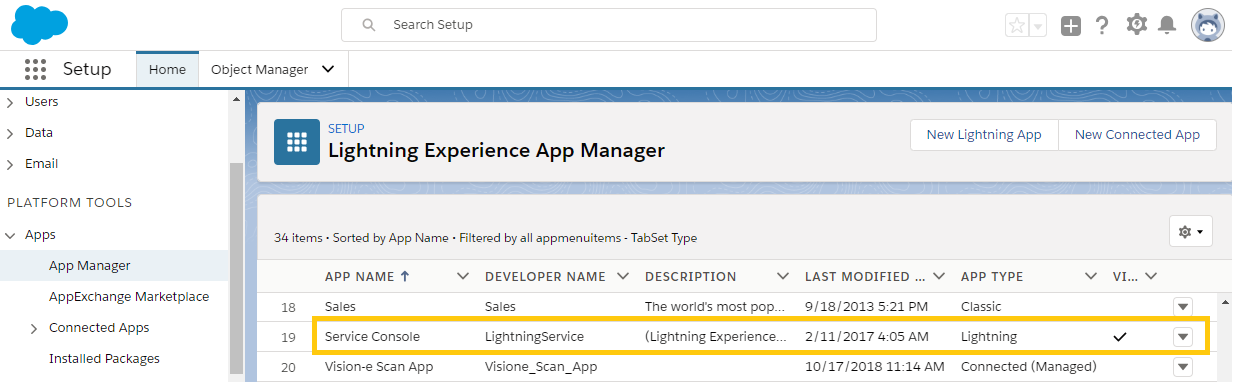
After installing the Managed Package, next configure the Salesforce App Setting and enable the Utility Item. Navigate to Setup > Home > Apps > App Manager:

Identify the row containing the Service Console APP NAME with Lightning as the APP TYPE. Click the down arrow at the end of the row and select Edit:
Click Utility Items on the resulting Lightning App Builder screen:

Click Add Utility Item:
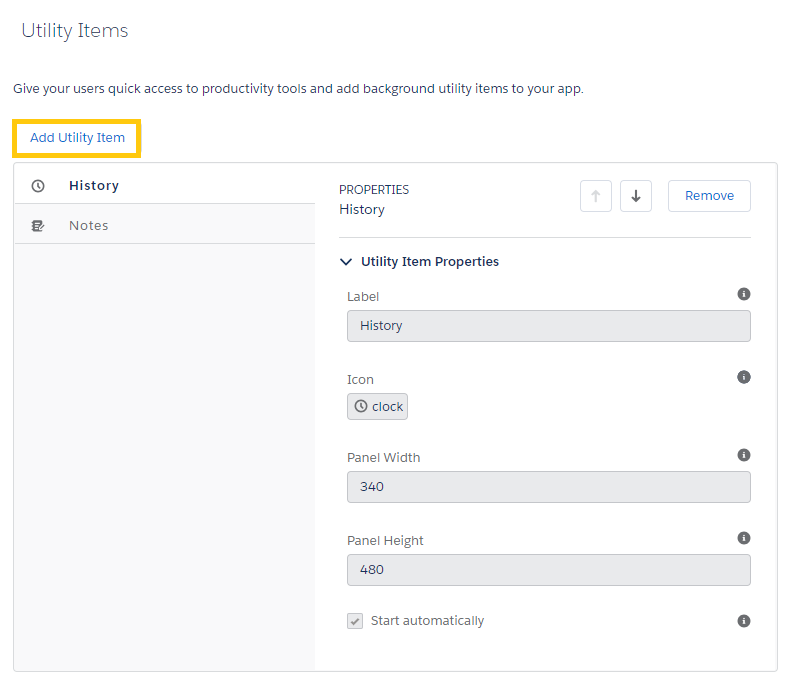
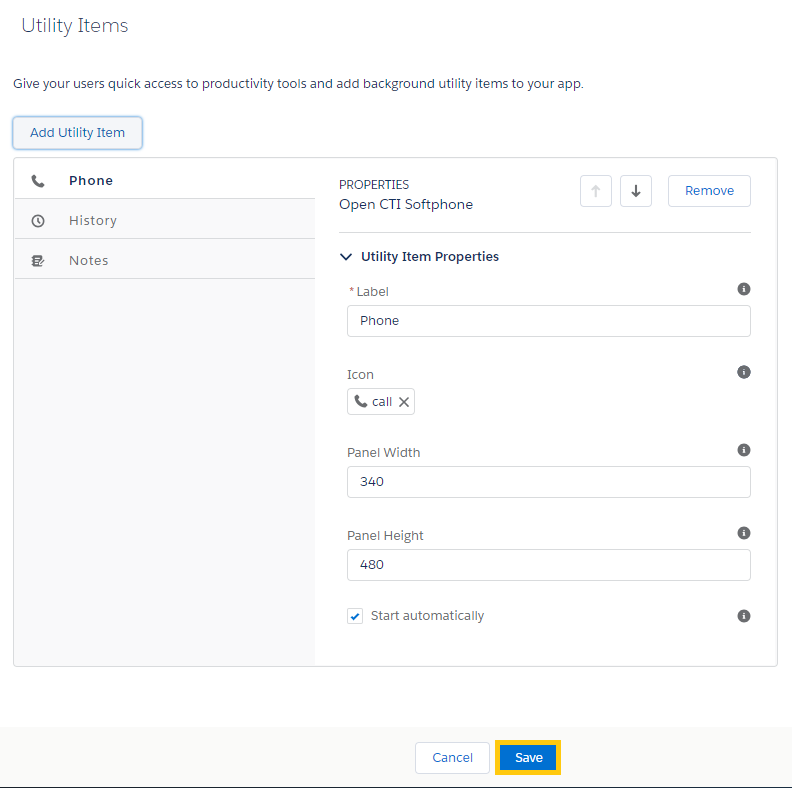
Click Open CTI Softphone:

Click Save at the bottom of the screen. The Synkato Managed Package with CTI Softphone is now installed.
Retrieve Salesforce Token
A Salesforce Admin account is required to retrieve a security token, which is required to access Salesforce via an API. The token itself is a case-sensitive code associated with your password.
Note: If you have a Salesforce token from installing other Salesforce software, skip these steps.
Click the View Profile icon on the top right of the screen:
![]()
Click Settings:

Next select Reset My Security Token on the left side of the screen:

Click Reset Salesforce Security Token. The new token is sent to the email address associated with the account.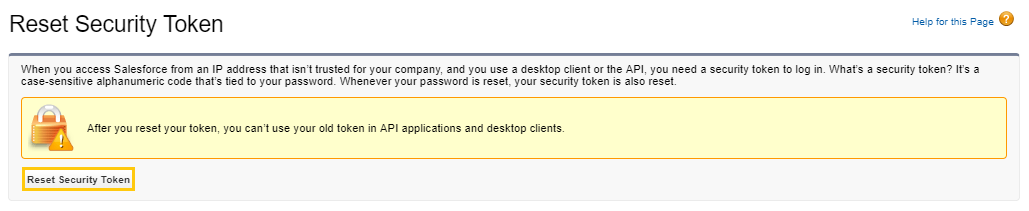
Notes: Salesforce recommends resetting the security token from a trusted network prior to accessing Salesforce from a new IP address.
Other applications may need to use this Security Token. Therefore, save the token in a secure location. If ever lost, repeat the steps above to update the Synkato configuration.
Configure Synkato for Salesforce
The last step in the Salesforce for Synkato integration is to configure the Synkato settings. Log in to Synkato and navigate to Workflow Tools > Salesforce Integration:

Salesforce Credentials Tab
- Click Enable Salesforce API checkbox.
- Click Sandbox Mode (recommended by Synkato) checkbox.
- Populate the Salesforce Username and associated Password (must have000 Salesforce Administrator account credentials).
- Paste the Security Token from the email received.
- Click Test Salesforce Credentials to validate the credentials.
- Upon success, click Save Salesforce Credentials.

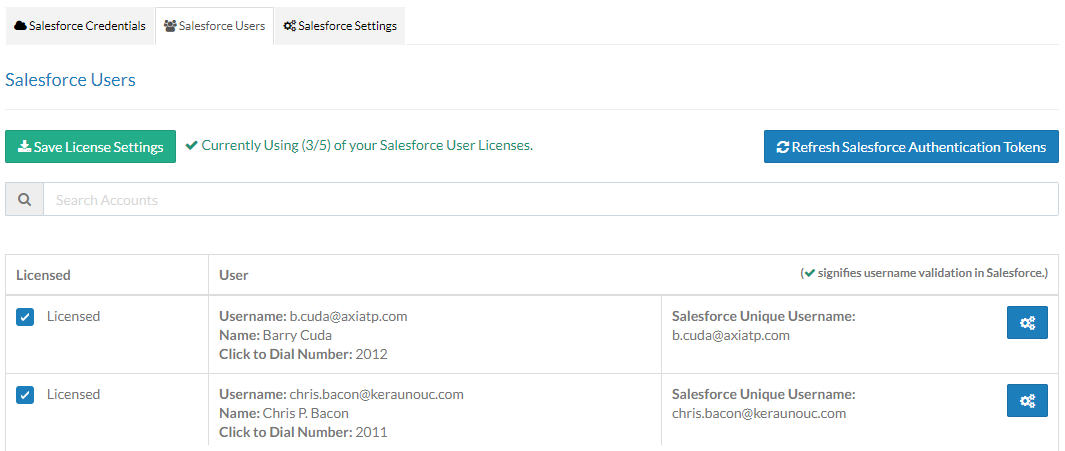
Salesforce Users Tab
The number of available Salesforce User Licenses displays at the top of the screen:
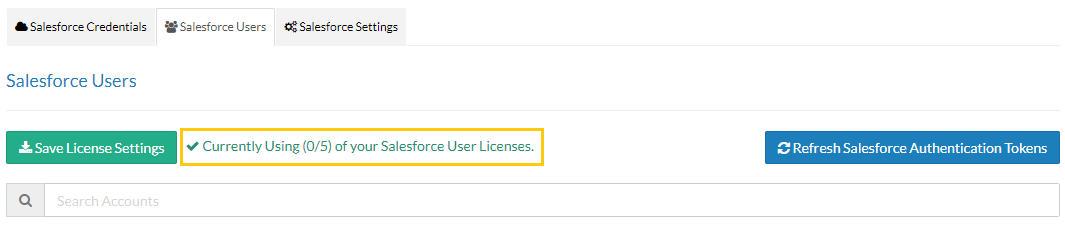
Best Practice: Before selecting users, click the cog icon to review the Salesforce Username and make any needed corrections. The Salesforce Unique Username in Synkato must match the Salesforce Username in Salesforce.
Example:
Salesforce Username is john_doe_salesforce@example.com
Synkato email is john_doe@example.com
Required action: Update the Salesforce Unique Username to john_doe_salesforce@example.com.
Click Save Salesforce Username anytime changes are made.

Apply check marks next to all licensed Synkato users to include in the Salesforce Managed Package. Click Save License Settings when done.
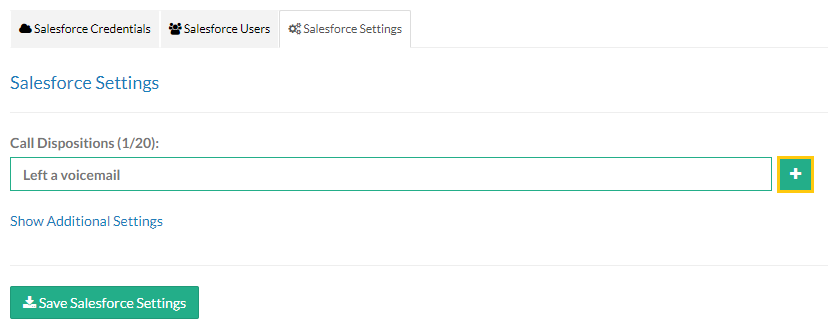
Salesforce Settings tab
An admin can add up to 20 Call Dispositions (call outcomes) that can be accessed and applied within the Salesforce integration.
Example call dispositions can include, but are not limited to:
- Qualified lead
- Left a voicemail
- Did not call
- Not interested
To add a new disposition, start typing in the open field and click the plus (+) sign when done:
Click the negative (-) sign to remove an active Call Disposition:

