A remote destination allows the System Administrator to push backups from the Kerauno server to another location, such as a dedicated backup server, remote hard drive, or cloud storage service. Remote Destinations allow the System Administrator to retain more than the seven daily backups stored locally. If a remote destination is configured, backups will be sent via FTP to the configured destination at the time set in the Run at: field in the Backup Settings section of the General tab. Backups will always save locally first, before being sent via FTP to the configured remote destination.
Add New Remote Destination
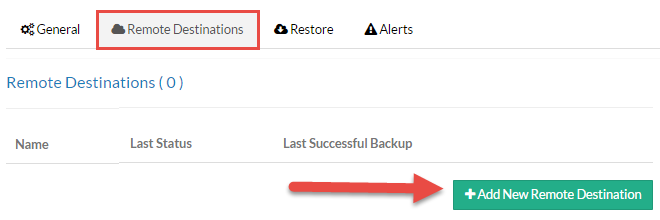
To add a new remote destination, select the Remote Destinations tab under the Backup/Restore menu and select the +Add New Remote Destination button.
 Figure 04: Remote Destinations Screen - Add New Remote Destination
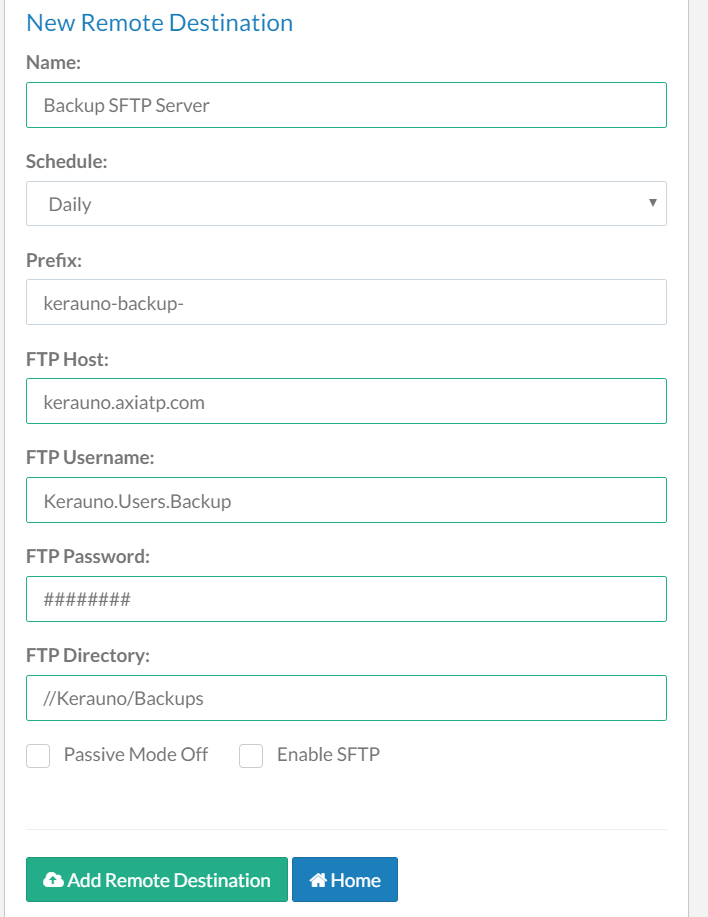
Kerauno will then display the New Remote Destination screen, which will allow the administrator to configure the FTP details of the remote destination. The fields on this menu include:
| Name: In this field, enter an easily recognizable name for this remote destination (e.g., Backup Server). Schedule: This field determines when backups are sent to the remote destination (Daily, Weekly, or Monthly). Kerauno sends the most current backup file to the remote destination at the backup-time specified. Prefix: The file name prefix listed here is added to the file name when sent to the remote destination. (e.g., kerauno-backup-201410140300.tar.gz.) FTP Host: The DNS name or IP address of the server to set as a remote destination (e.g., ftp.mydomain.com). FTP Username: The FTP username needed to connect to the FTP host. FTP Password: The FTP password that is associated with the FTP username entered. FTP Directory: The directory or sub-directory backup files should be saved to (e.g., /Kerauno/Backups).Passive Mode Off: Click this checkbox to... Enable SFTP: Click this checkbox to enable Secure File Transfer Protocol (SFTP). |
|
When finished modifying and configuring the FTP details of the remote destination, be sure to click the Add Remote Destination button to ensure that the changes are saved to Kerauno.
Delete a Remote Destination
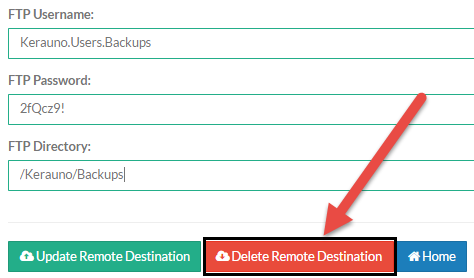
On the Remote Destinations tab, click an existing remote destination's name to select it. Kerauno will then open the Remote Destination Configuration screen. Select the Delete Remote Destination button at the bottom of the page to remove the remote destination.
 Figure 06: Remote Destination Configuration Screen - Delete Remote Destination Button
A confirmation that the destination will be deleted is displayed. Press OK and Kerauno will return to the main menu after the remote destination has been removed.

