When creating time filter groups, custom parameters may be set for holiday filters that only occur on certain days of the year.
Open the call flow you want to add the holiday filter to then click and drag the New Time Filter option onto the call flow object you want the time filter to be after as illustrated in Figure 01 below.
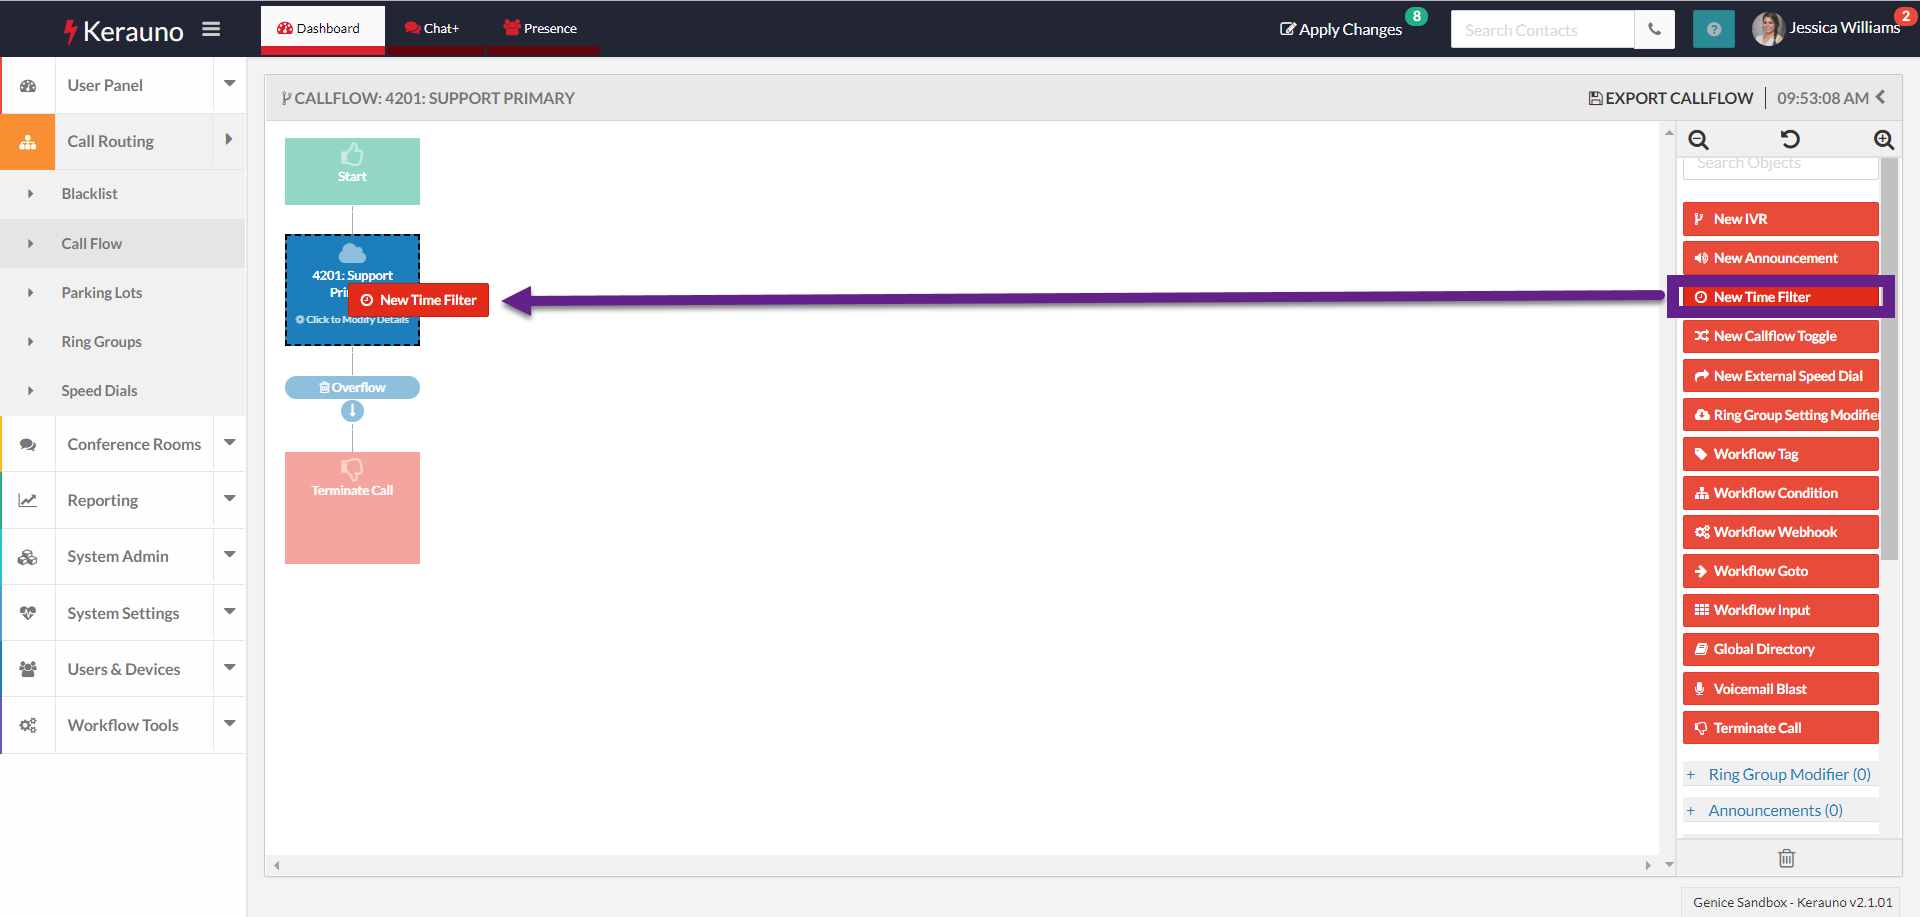 Figure 01: Adding New Time Filter
When you drop the New Time Filter object onto the call flow the Create New Time Filter pop-up is displayed as illustrated in Figure 02 below.
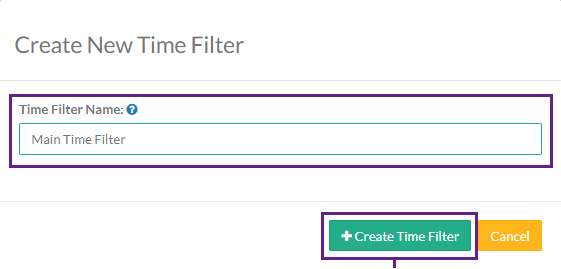 Figure 02: Create New Time Filter Pop-up
Enter a Time Filter Name to identify what the filter is for. In this example, because we're creating a holiday time filter, the name "Main Time Filter" is used. Click the Create Time Filter button to insert the time filter (refer to Figure 03 below).
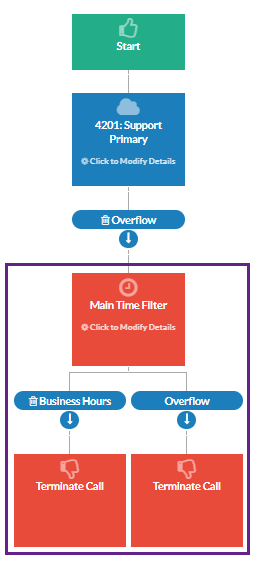 Figure 03: Inserted Time Filter
Click and drag an object from the list on the right to the new time filter as illustrated in Figure 04 below.
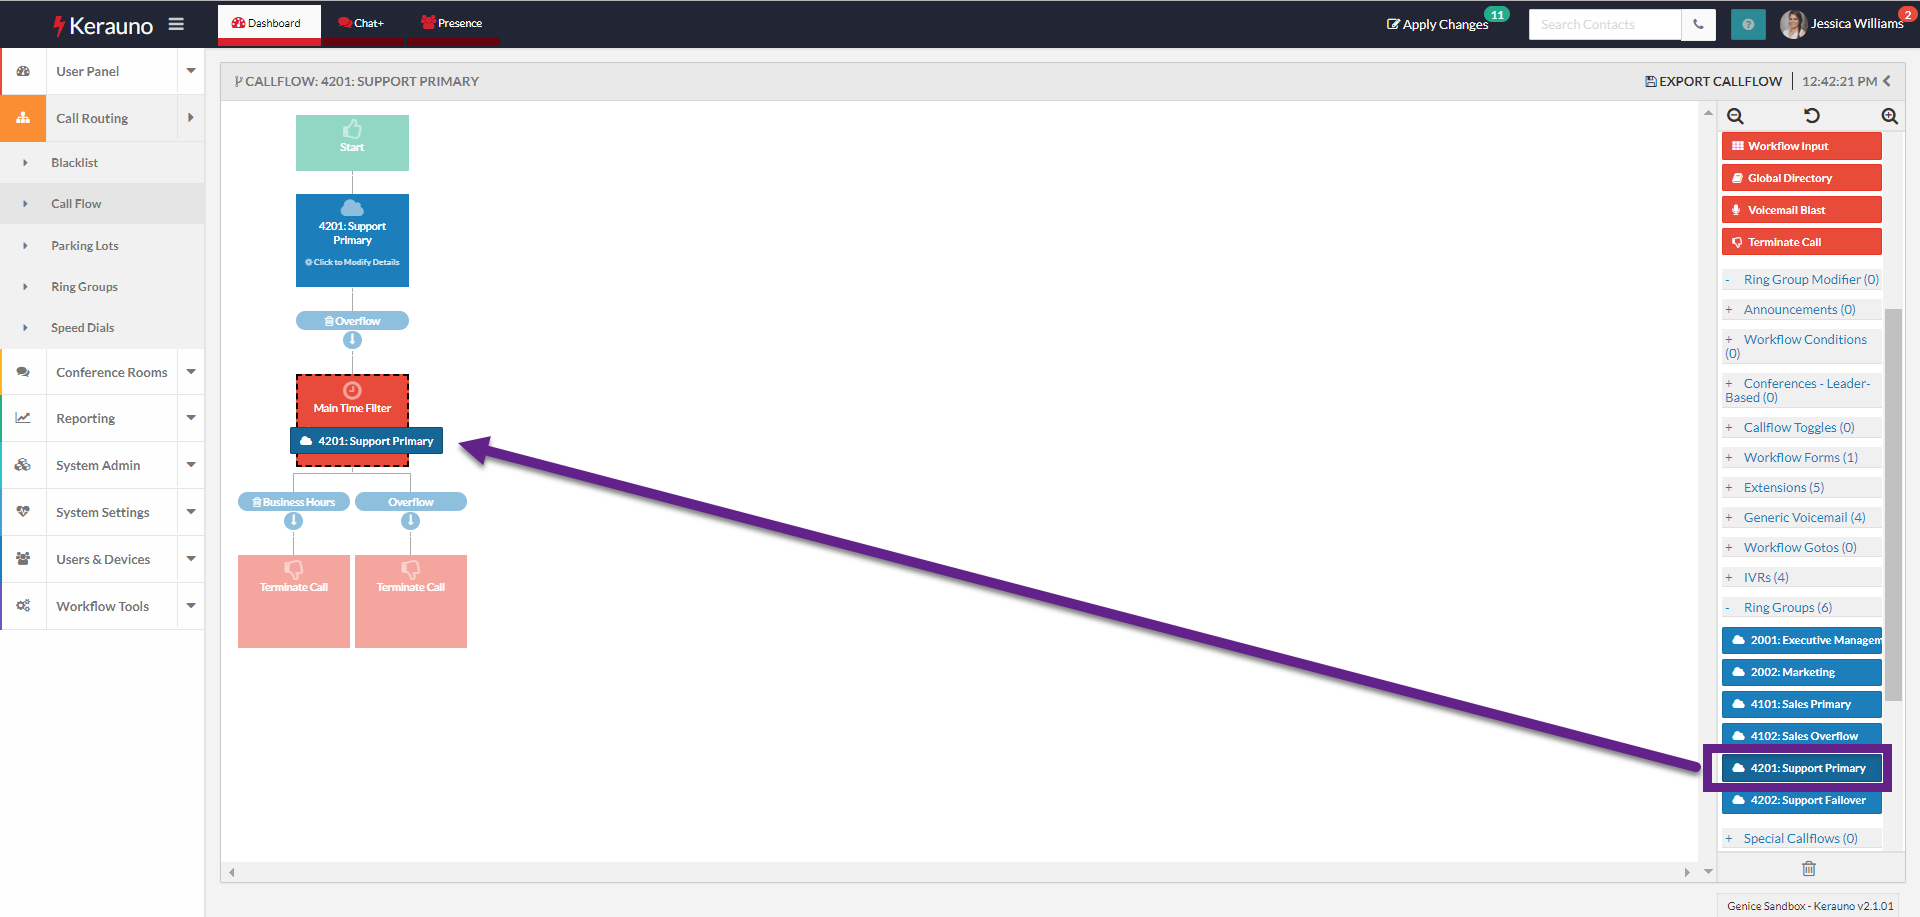 Figure 04: Add Object to Filter
This displays the Multiple Destinations Available pop-up as in Figure 05 below.
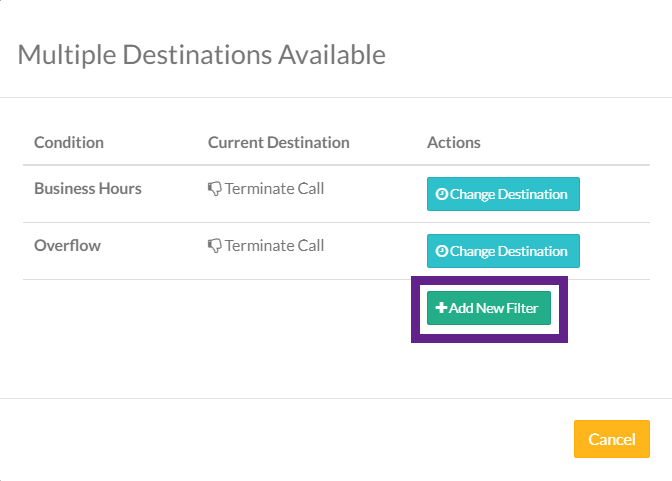 Figure 05: Multiple Destinations Available Pop-up
Holiday filters are enabled for a 24-hour period on a specific month/day of the year, while Week/Time filters can be set by time and day of week. Select the Add New Filter button to display the New Time Filter pop-up. Select the Build Holiday Filter button to begin creating your holiday filter (refer to Figure 06 below).
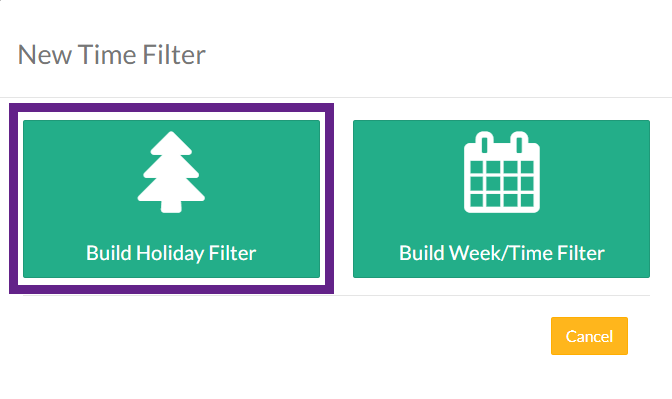 Figure 06: New Time Filter Pop-up
The New Time Filter pop-up for adding dates is displayed; it allows you to set dates for holidays as illustrated in Figure 07 below.
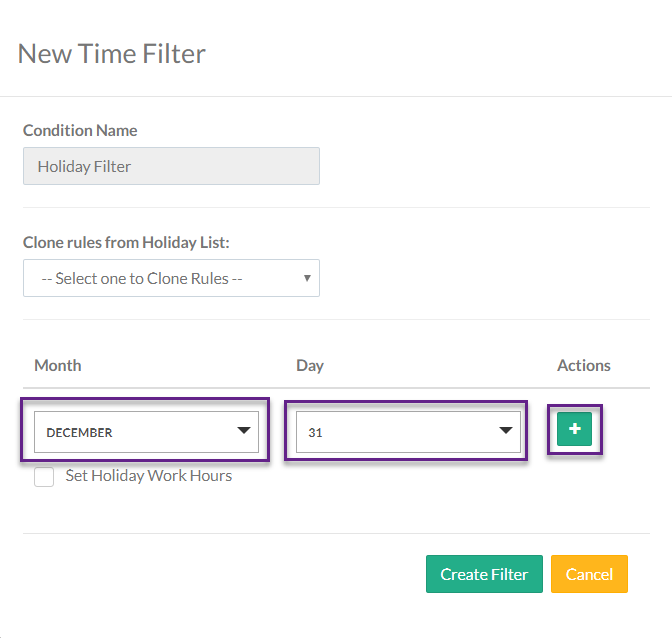 Figure 07: New Time Filter Pop-up: Add Dates
Select the Month and Day for the first holiday then press the plus button to add another row for the next holiday. Add as many rows as you need for your holidays. Once all your holidays have been added, select the Create Filter button at the bottom-right of the pop-up (refer to Figure 08 below).
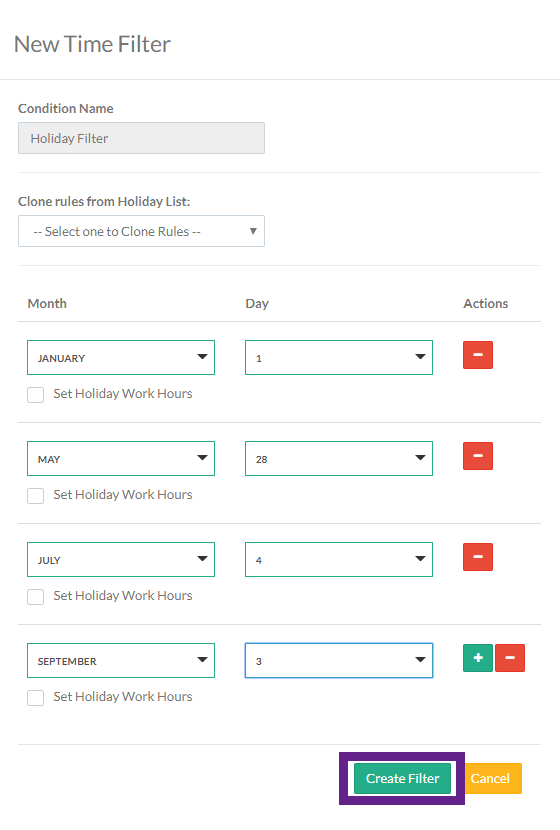 Figure 08: Create Filter Button
The holiday filter will be added to the call flow tree and appear with whichever dragged destination was assigned as in Figure 09 below.
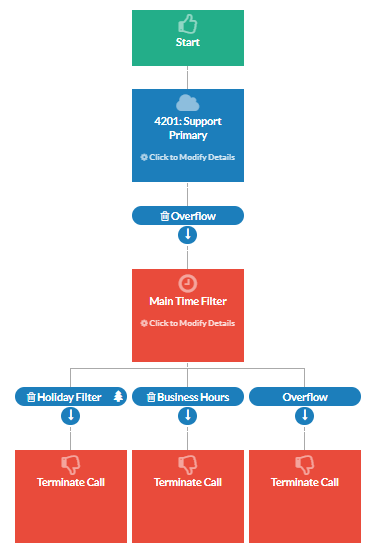 Figure 09: Filter Added to Call Flow
To add the Holiday List Filter to other call flows, select the object from the Time Filters list at the right of the screen then click and drag it where you want it in the call flow (refer to Figure 10 below).
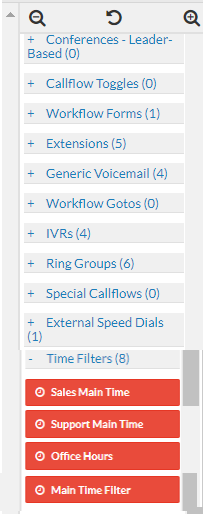 Figure 10: Time Filters List
