Machine Requirements
- Synkato Desktop Application only for the Lynk Desktop Application
Enabling the Integrated Softphone on a User
Once the Lynk Softphone is enabled on the system, you can enable the Lynk Softphone on Users. The option to enable the Lynk Softphone is located under the "Softphone" Tab on the user configuration page.
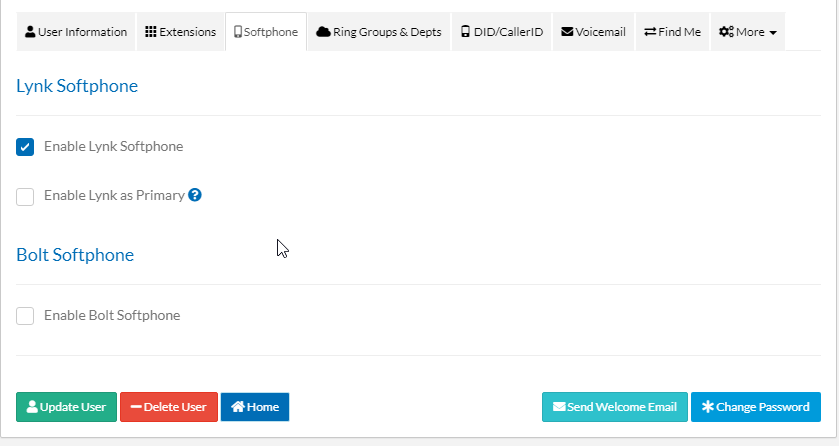
Here you can either enable Bolt or Lynk on a User. Just like with Bolt, you can also set Lynk as the primary device. However, unlike Bolt the Primary device will be set to the Lynk Desktop Extension, with the Lynk Mobile Extension being secondary.
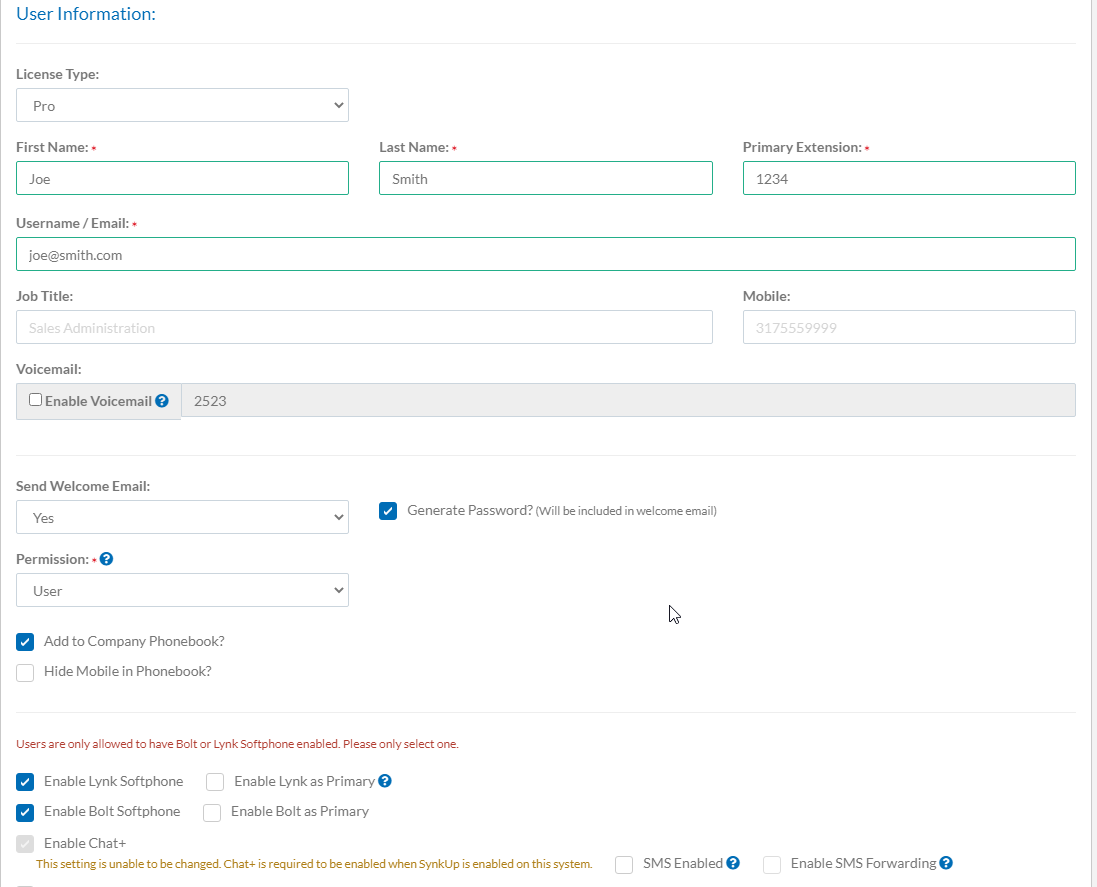
NOTE: You cannot have both Bolt and Lynk enabled on a single User at the same time.
A warning will be shown if you have both Lynk and Bolt enabled on a User, and the “Update User” button will be disabled.
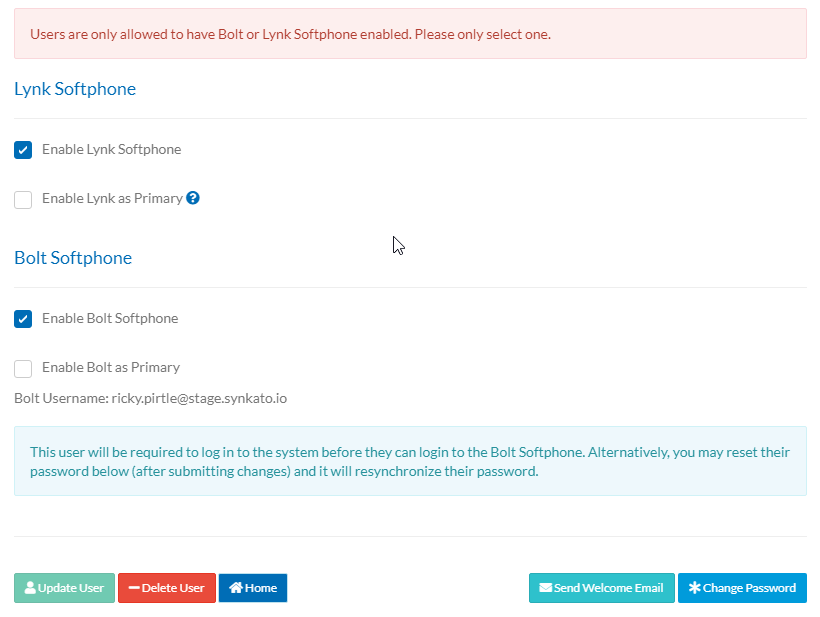
The same goes for Adding a User.
Default User Configuration
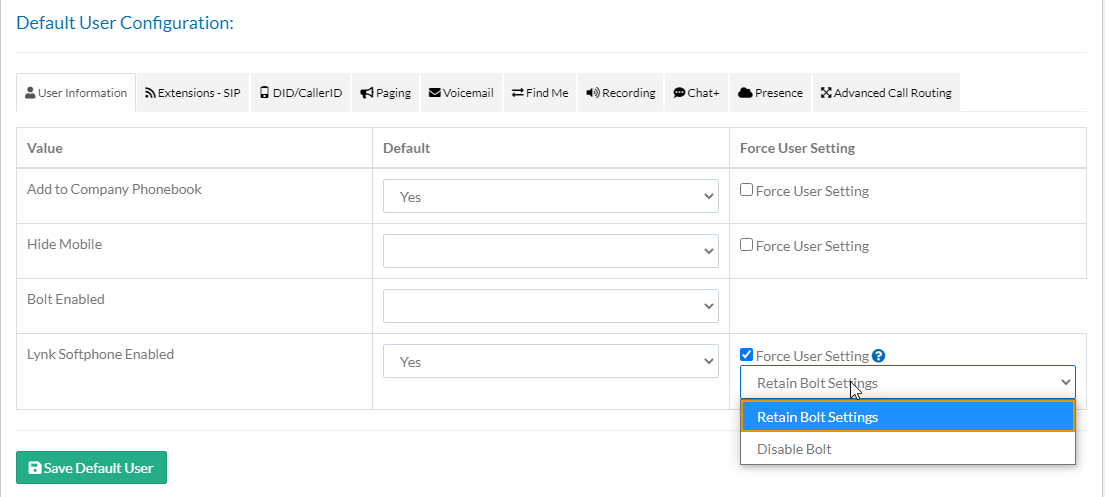
You can set Lynk to Yes or No in the Default User Configuration. You can also force all users to have this. There are two options when force enabling Lynk :
Retain Bolt Settings: If you choose to force enableLynk on every user, this will only force Lynk on users without Bolt already enabled. If they have Bolt enabled, they will keep their Bolt settings and Lynk will not be enabled on that user.
Disable Bolt: If you choose to force Lynk on every user, this will force Lynk on EVERY user, even if they have Bolt enabled. If they have Bolt enabled, Bolt will become disabled and they will have Lynk enabled instead.
Lynk Desktop
Minified View vs Expanded View vs External Tab View
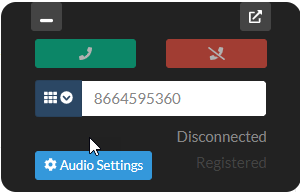
Minified View (lower right hand corner):

In the minified view, at any point, the user can change to the expanded view using the button indicated with the grey button with a square icon. See sections below for more details on what can be done while in different states and what is displayed.
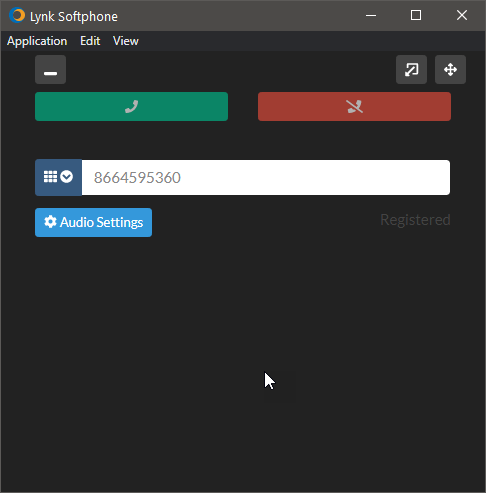
Expanded View:
In the extended view, at any point, the user can change to the minified view (grey button in the top left with an underscore icon). The user can also change to the external tab view (grey button in the top right with a pop out icon), but only while the softphone is in an idle state. See sections below for more details on what can be done while in different states and what is displayed.
External Tab View:
The extended Lynk view is the same as the expanded view within the Synkato application, only it is in its own window. Within Synkato, in place of where the Lynk softphone was previously framed in, there is a button to un-externalize the softphone. The same button is available in the external instance of the softphone. Either one will close the window and bring the softphone back into the Synkato app. This will, however, end any active call the user is on.
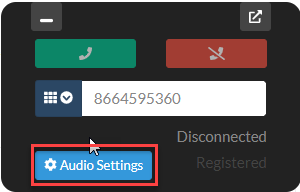
While the softphone is in either expanded or minified view, the user will see disabled call buttons and be able to view the current registration status.
In expanded view, the user can control the Audio Settings (see Audio Settings section for more information) and can input a destination via their keyboard or the drop down dial pad (see Destination Input / Dial pad section for more information). Once a valid destination is in the input section, the call button will become enabled and be able to be clicked. The user will also be able to click enter to send a call to the destination. Destination validation is based on our same validation in the Number Manager within the Synkato application (to allow for international numbers) in addition to allowing 3-5 digit destinations to cover direct extension calling.
Destination Input / Dialpad
Not on active call / idle, dialpad minimized:
Not on active call / idle, dialpad maximized:
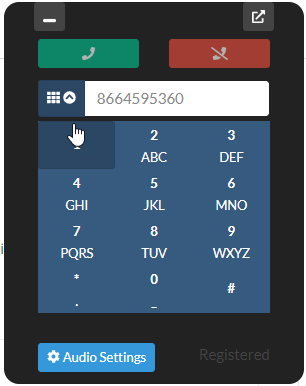
Active Call, dial pad minimized:
Active Call, dial pad maximized:
To input a desired call number via the keyboard, click within the input section and start typing.
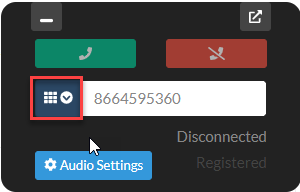
To input a desired call number via the dial pad, click the button with the dial pad and down arrow icons. This will expand the dial pad to allow the user to click numbers with their mouse or touch-pad. Click the button (now with an up arrow) to minimize the dial pad. The dial pad will be accessible when the softphone is in an idle state and while a call is active. The dial pad is the only way for the user to use DTMF tones while on a call.
NOTE: Feature codes do not currently work with this iteration of the integrated softphone.
Audio Settings
In any state, audio settings minimized:
In any state, audio settings maximized:
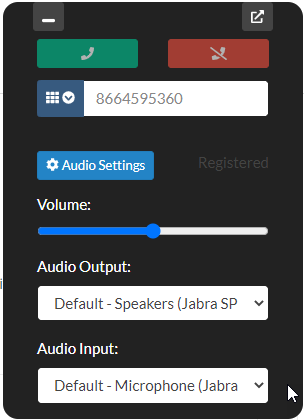
While the softphone is in any state, the user can change the following settings:
OUTPUT VOLUME: This controls the volume of the output device.
NOTE: This setting is based on the current volume set on your device - ie, if your device is set to 25% volume and this slider is all the way to the right, the audio output will be at 25% of the maximum volume for your device. However, if your device is still set to 25% volume and the slider is in the middle, the audio output will be at 12.5% of the maximum volume for your device. This can be changed at any time - whether the softphone is in an idle state or on an active call.
AUDIO OUTPUT: This controls the device that plays the audio output. This can be changed at any time - whether the softphone is in an idle state or on an active call.
While the softphone is in an IDLE state, the user can change the following settings:
AUDIO INPUT: This controls the device that is used as the microphone. This can only be changed while the softphone is in an idle state. There will be future consideration to iterate and improve this functionality.
Incoming Call
Softphone in minified view (the bell icon shakes):

Softphone in expanded view (the bell icon shakes):
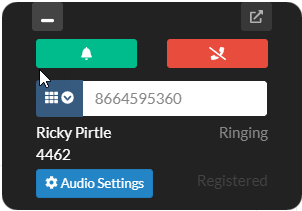
While the softphone is in either expanded or minified view, the user will see the answer and end call buttons become enabled and the answer button icon will switch from a phone to a shaking bell. The user will also see the caller’s name.
In expanded view, the user will still have access to Audio settings. The user will also be able to see the caller’s number and the current call status (Ringing) and will still see the current registration status of the peer.
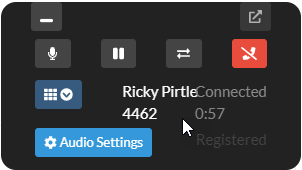
Active Call
Minified view, outgoing call is ringing (this view would not be seen very often as they would have to call then minify the view before the person they are calling picked up):

Expanded view, outgoing call is ringing:
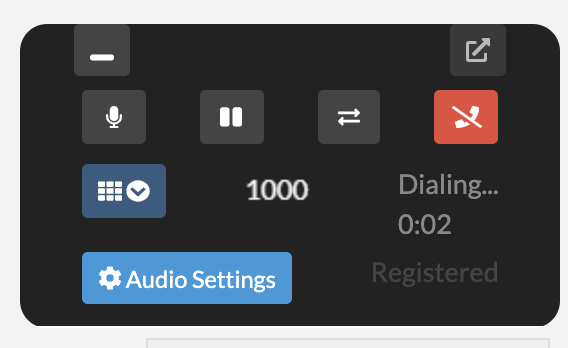
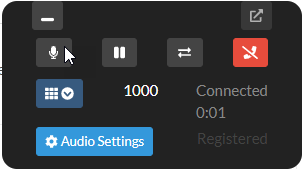
Minified view, outgoing call is connected:

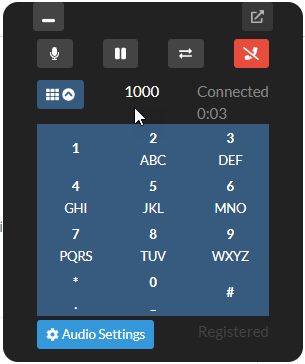
Expanded view, outgoing call is connected:
Minified view, incoming call is connected (note, the CallerId shows name):

Expanded view, incoming call is connected (note, the CallerId shows name and number):
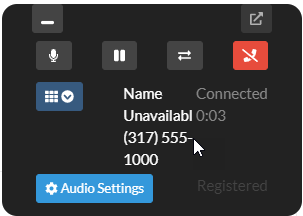
While the softphone is in either expanded or minified view, the user will see the mute, hold, and end call buttons. The user will also see the caller’s name, when available, and the call duration timer.
In the expanded view, the user will also have access to the transfer button (see the Call Transfers section for more information). The user will also see the caller’s number in addition to their name, when available.
Mute
The mute button will be available for active calls in both the minified and expanded views. This will mute the user’s microphone, but will not mute the audio output. If the user wants to mute the audio output, they will need to adjust the volume within Audio Settings or globally on their machine’s volume settings.
When transferring a call via Consult Transfer, the mute status will persist between channels, functioning similarly to a mute button on a physical device. For more information on what is meant by between channels, see the Call Transfers section.
Call Transfers

NOTE: Once a transfer has started, the screens will be the same whether the user placed an outbound call or received an inbound call initially.
The transfer button will be available for active calls in only the expanded view. To start a transfer, click the transfer button. The channels themselves will NOT be altered yet - the two parties will still actively be on a call.
To initiate the transfer, the user will need to input a new destination via their keyboard. Once the destination passes the validation (same as the validation when the softphone is in idle state), the Transfer Now and Consult Transfer buttons will become enabled.
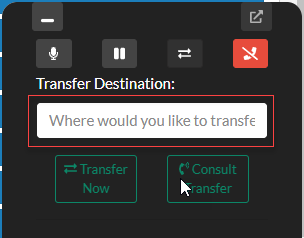
To transfer directly to the destination (also called a Blind Transfer), click the Transfer Now button. The other channel will be transferred to the desired destination and the user’s channel will be terminated. The softphone will then revert to an idle state.
To consult with the intended destination (also called an Attended Transfer), click the Consult Transfer button. This will put the other channel on hold and connect the user to the desired destination. The softphone will then change it’s appearance to indicate the following:
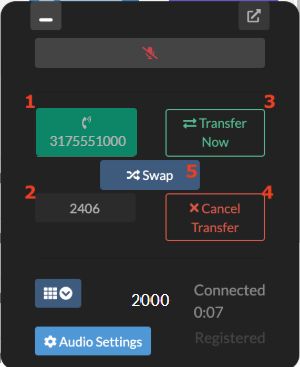
Current active call - this will be indicated with a green background and a phone icon next to the number
Held call - this will be indicated with a grey border and just the number
Transfer now button - click this button once the consult is complete and the consulted party is ready to receive the transfer
Cancel Transfer - click this button to cancel the transfer. This will reconnect the user with the initial call channel and terminate the call with the consulted destination
Swap Button - this button is to allow the user to swap between active channels. This is beneficial if the consulted party needs additional information and the user needs to connect back with the original channel. Clicking this button will put the currently active call on hold and unhold the held call. The number sections will switch accordingly, so the active call always has the green background with the phone icon.
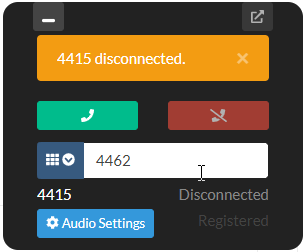
If a channel is terminated by the remote party during a consult transfer, this alert message will appear. It will indicate which caller was terminated by displaying their number. The user will then automatically be connected with the active party within the transfer (whether that be the original caller or the consulted party, based on which channel terminated).
Lynk Mobile
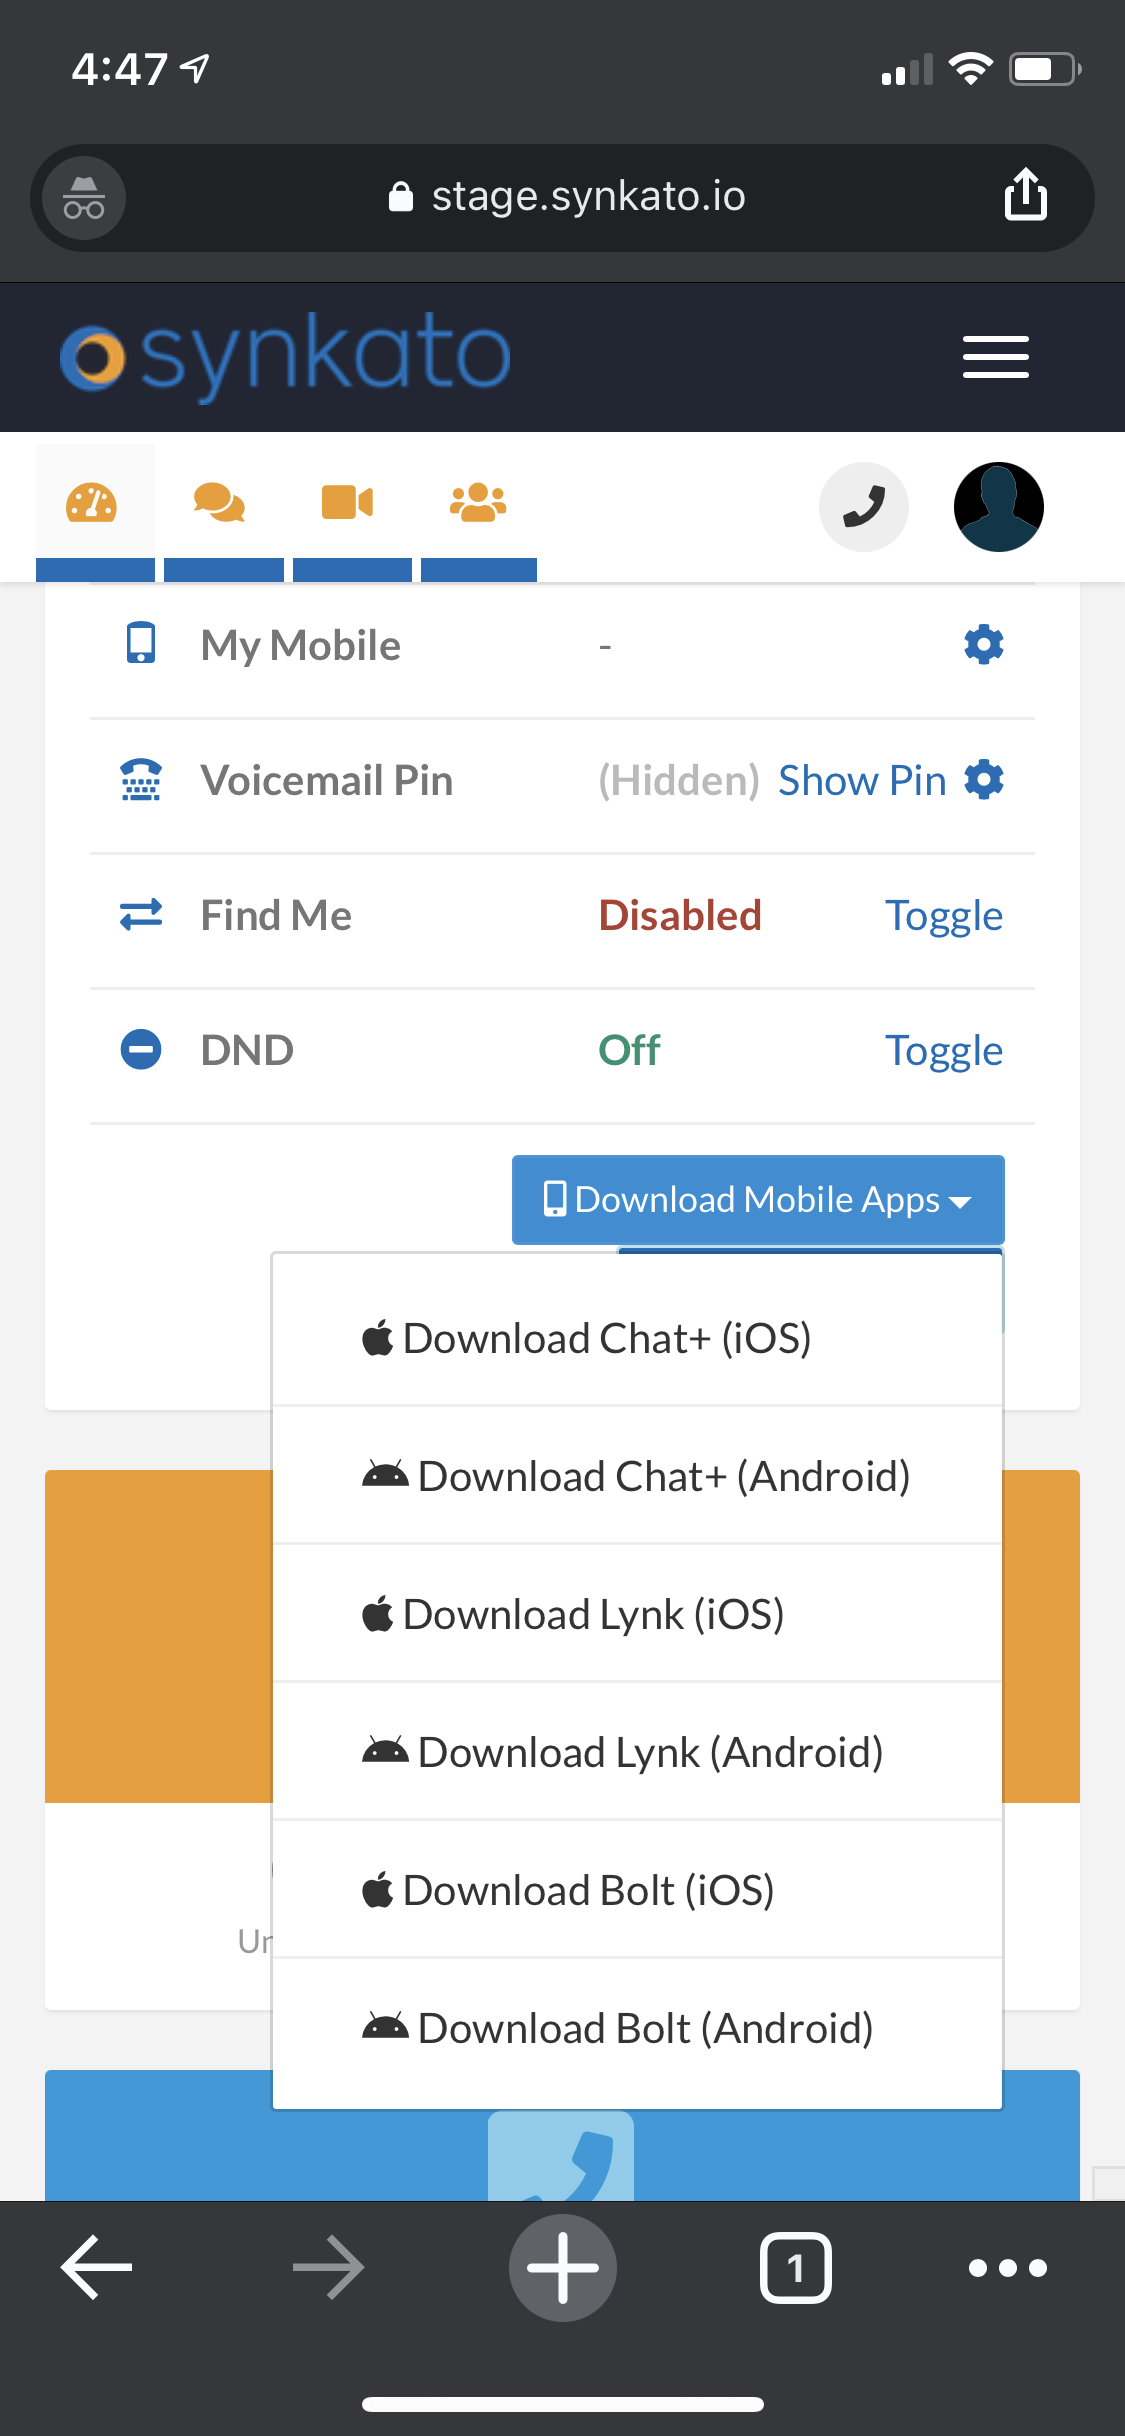
Lynk Mobile can be downloaded from either the iOS App store for Apple users, or via the Google Play store for Android users. You also have the ability to login to the Synkato Dashboard via your Mobile device and click the link to download your desired app.
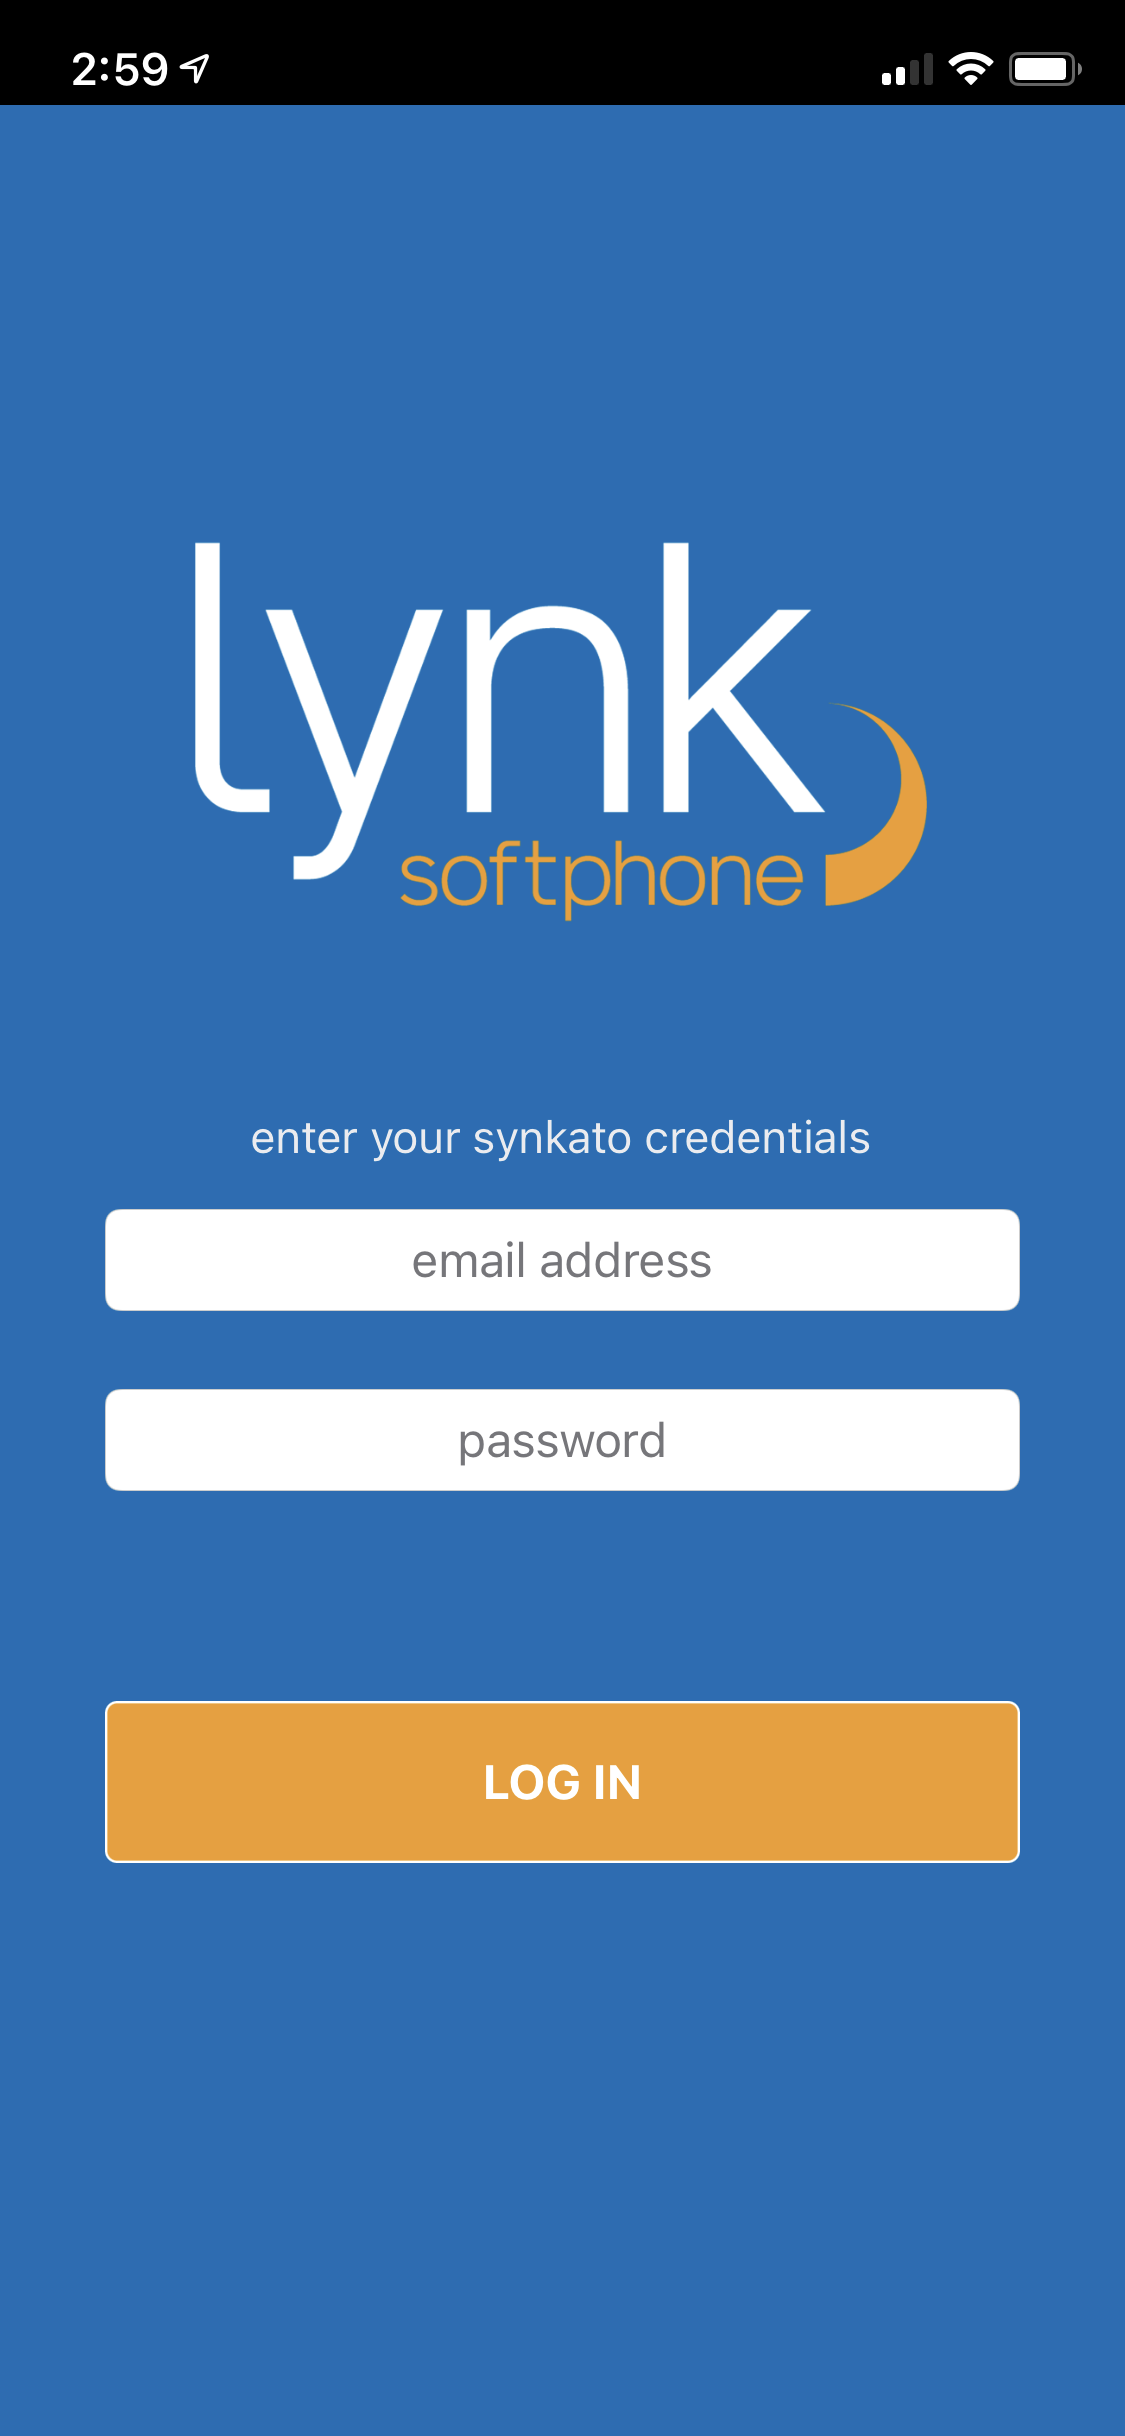
Once the app is downloaded you will see the below screen where you can enter your login credentials. These credentials are the same that you use to login to the Synkato UI.
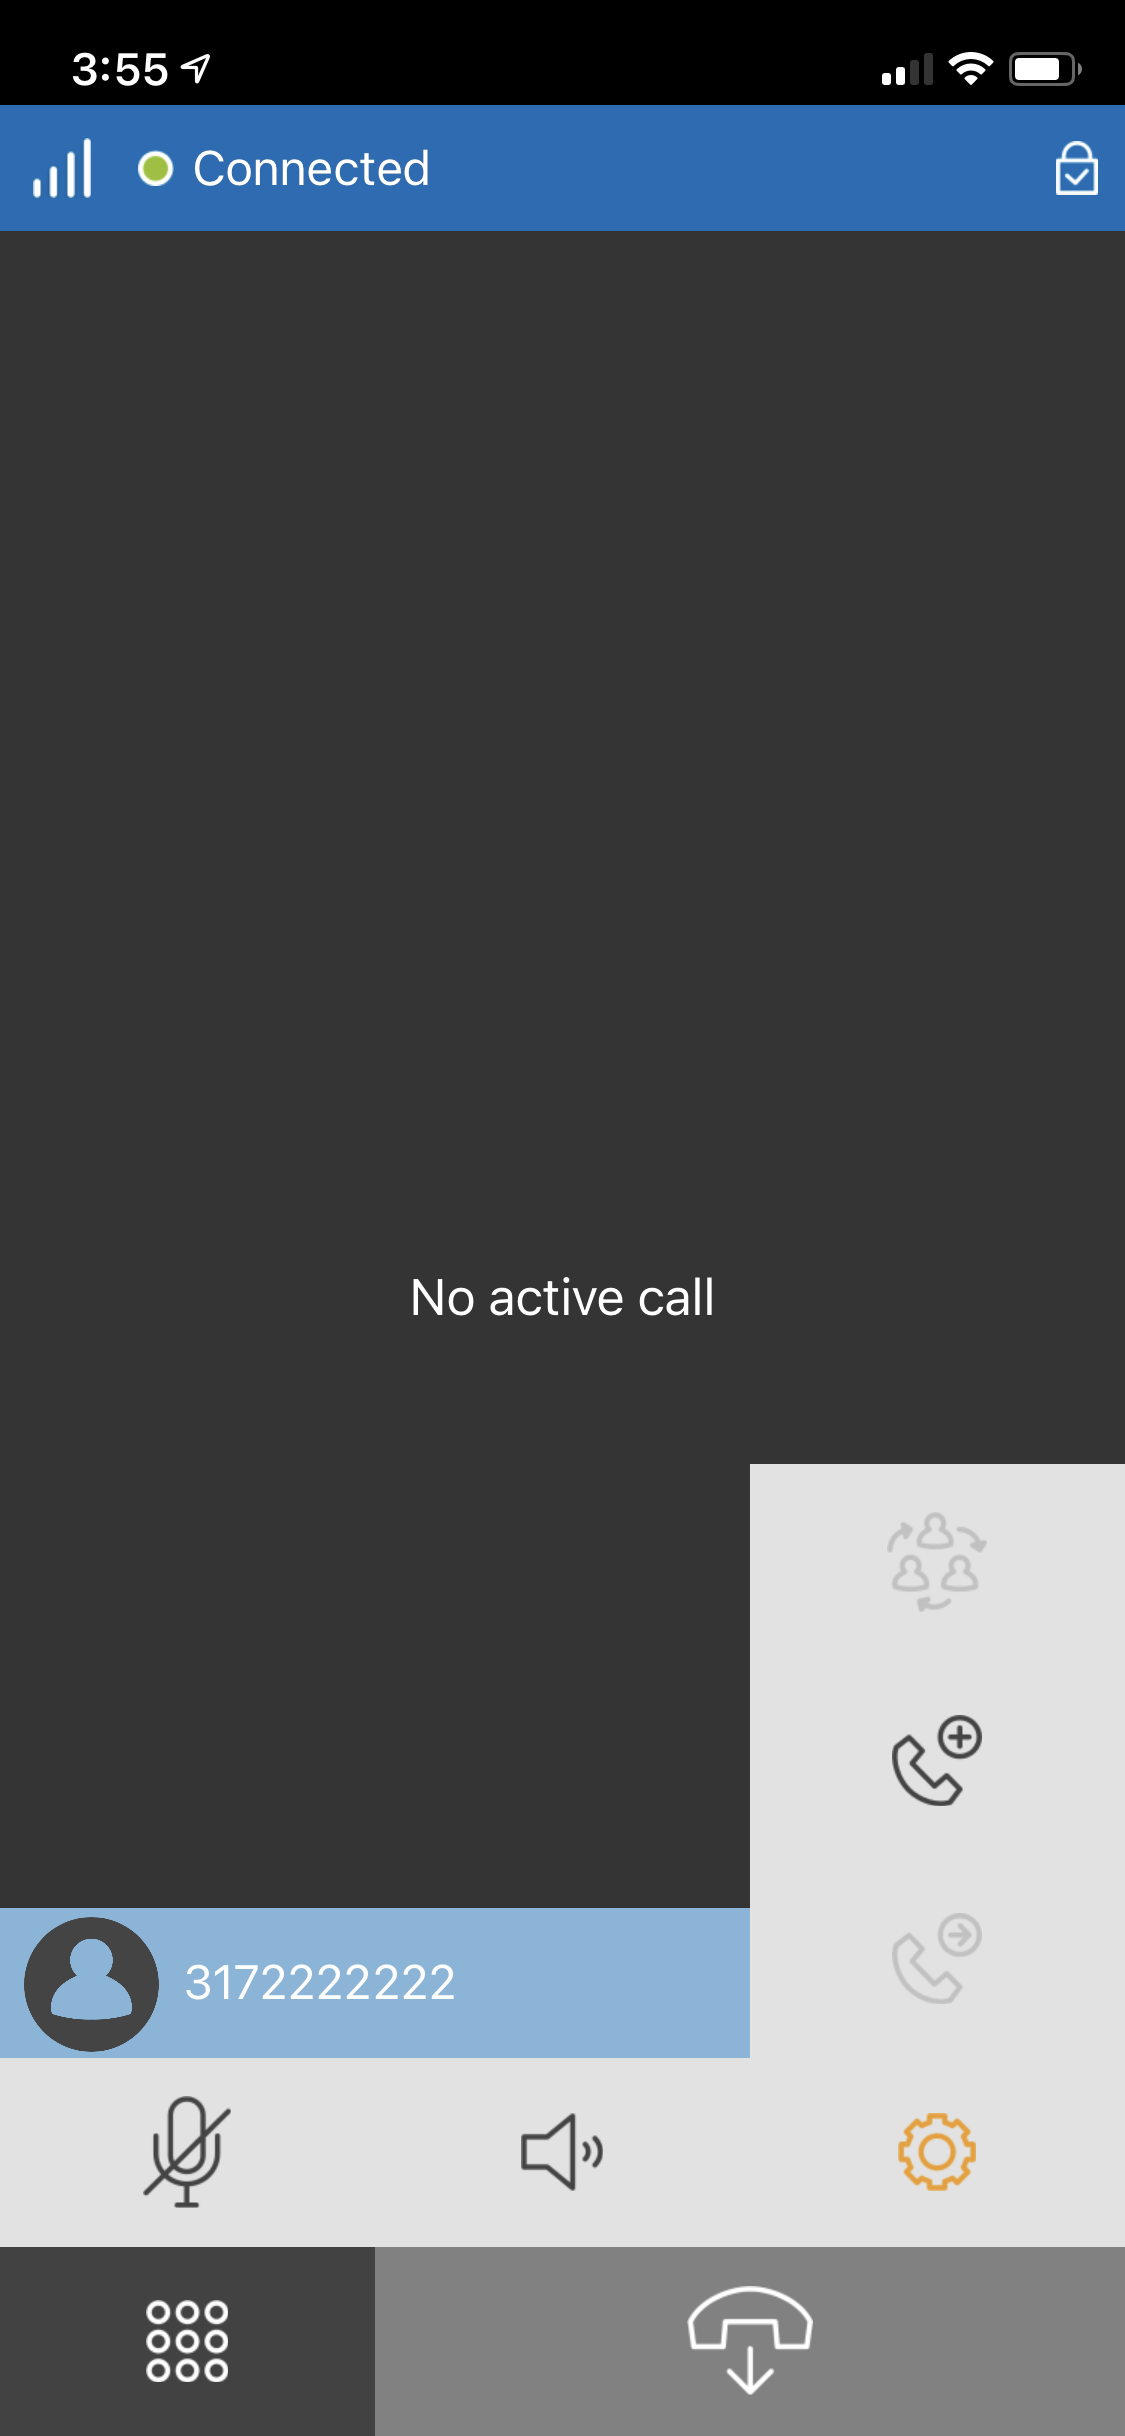
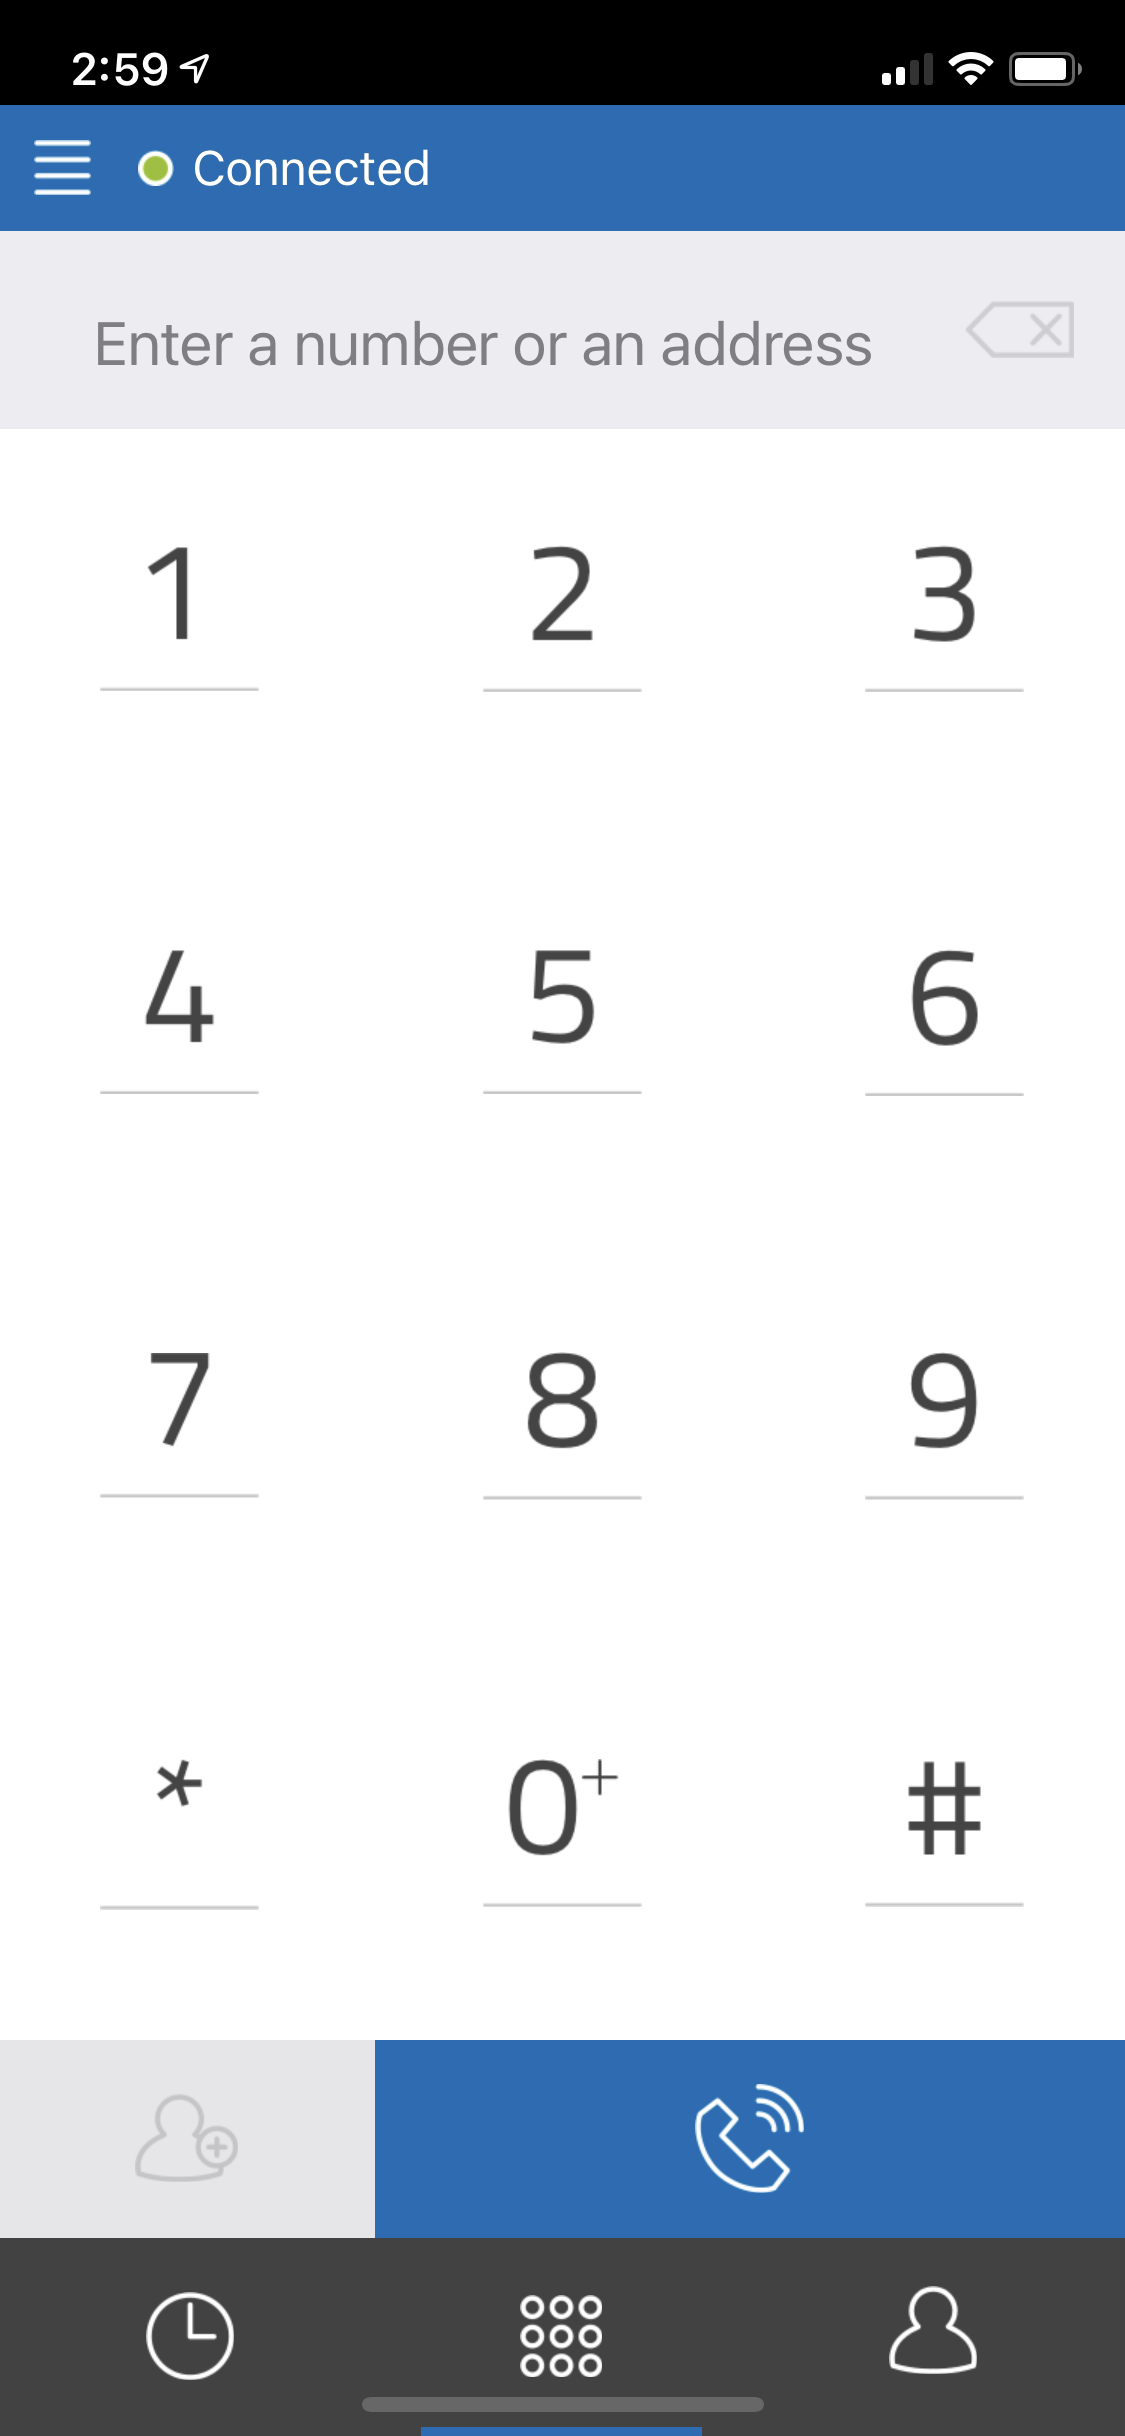
Upon logging in you will see the Connected message in the top left which means you are ready to make and receive calls.
While on an active call you will be presented with the below screen. There are a few options that you can take advantage of when on a call.
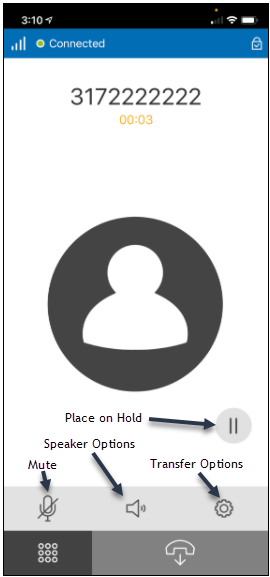
After placing a call on Hold you can click the gear Icon for the transfer Options.

You can click the call + icon and then dial the number or extension you wish to transfer to.